Table of Contents
Needs
I am writing this post to record the effective method for establishing a automatic workflow that ensure my Linux desktop system is backed up correctly.
With no pain, and no messy things, totally use open-source software make this work seamlessly after configuring the process.
Overview
- Prepare for the entire process
- Install backrest manually
- Configure backrest through webui
- Perform a full backup and attempt a restore for a reliability test
- Make it happen seamlessly
- Fix systemd-boot under LiveCD
Before you go
!WARNING!
The following operations are done in my CachyOS system, if you're using other Linux Distros, I can not promise that would work.But I think the whole process could be reproduced because of the idea: "Everything is a file"
Prepare
Take me as an example, I install my CachyOS in an 240GB NVME disk, and I use systemd-boot rather than Grub as bootloader.Also, I have set LUKS encryption for my root XFS disk volume.
I installed a 500GB hard disk drive on the motherboard and later erase it into XFS file system.This disk will serve as the backup volume, mounted at /run/media/admin/715335b3-bd5e-4ee4-8cde-c1298fe669df/ by KDE Device-Auto-Mount(715335b3-bd5e-4ee4-8cde-c1298fe669df is the UUID of the disk partition it can be found by blkid command ).
Notice: You can also make backup disk mount automatically by configure /etc/fstab, but I won't make a deep explanation here.
Install backrest
There is an official guide for installing backrest.
Here I write a few commands suitable for mostly Linux Distros to install it.
mkdir ~/Downloads

cd ~/Downloads

curl -L https://github.com/garethgeorge/backrest/releases/latest/download/backrest_Linux_x86_64.tar.gz -o ~/Downloads/backrest_Linux_x86_64.tar.gz

mkdir ~/Downloads/backrest_Linux_x86_64

tar -zxvf ~/Downloads/backrest_Linux_x86_64.tar.gz -C ~/Downloads/backrest_Linux_x86_64

sudo cp ~/Downloads/backrest_Linux_x86_64/backrest /usr/bin/backrest

rm -rf ~/Downloads/backrest_Linux_x86_64 ~/Downloads/backrest_Linux_x86_64.tar.gz
Then input backrest in terminal to see if it works.
After that, create a backrest.service to manage backrest by systemd.
/etc/systemd/system/backrest.service
[Unit]
Description=Backrest Service
After=network.target

[Service]
Type=simple
User=root
Group=root
ExecStart=/usr/bin/backrest
Environment="BACKREST_PORT=127.0.0.1:9898"

[Install]
WantedBy=multi-user.target
PS: Here I set User=root to make sure backrest could read all files.
sudo systemctl daemon-reload
sudo systemctl enable backrest --now
sudo systemctl status backrest
Configure backrest
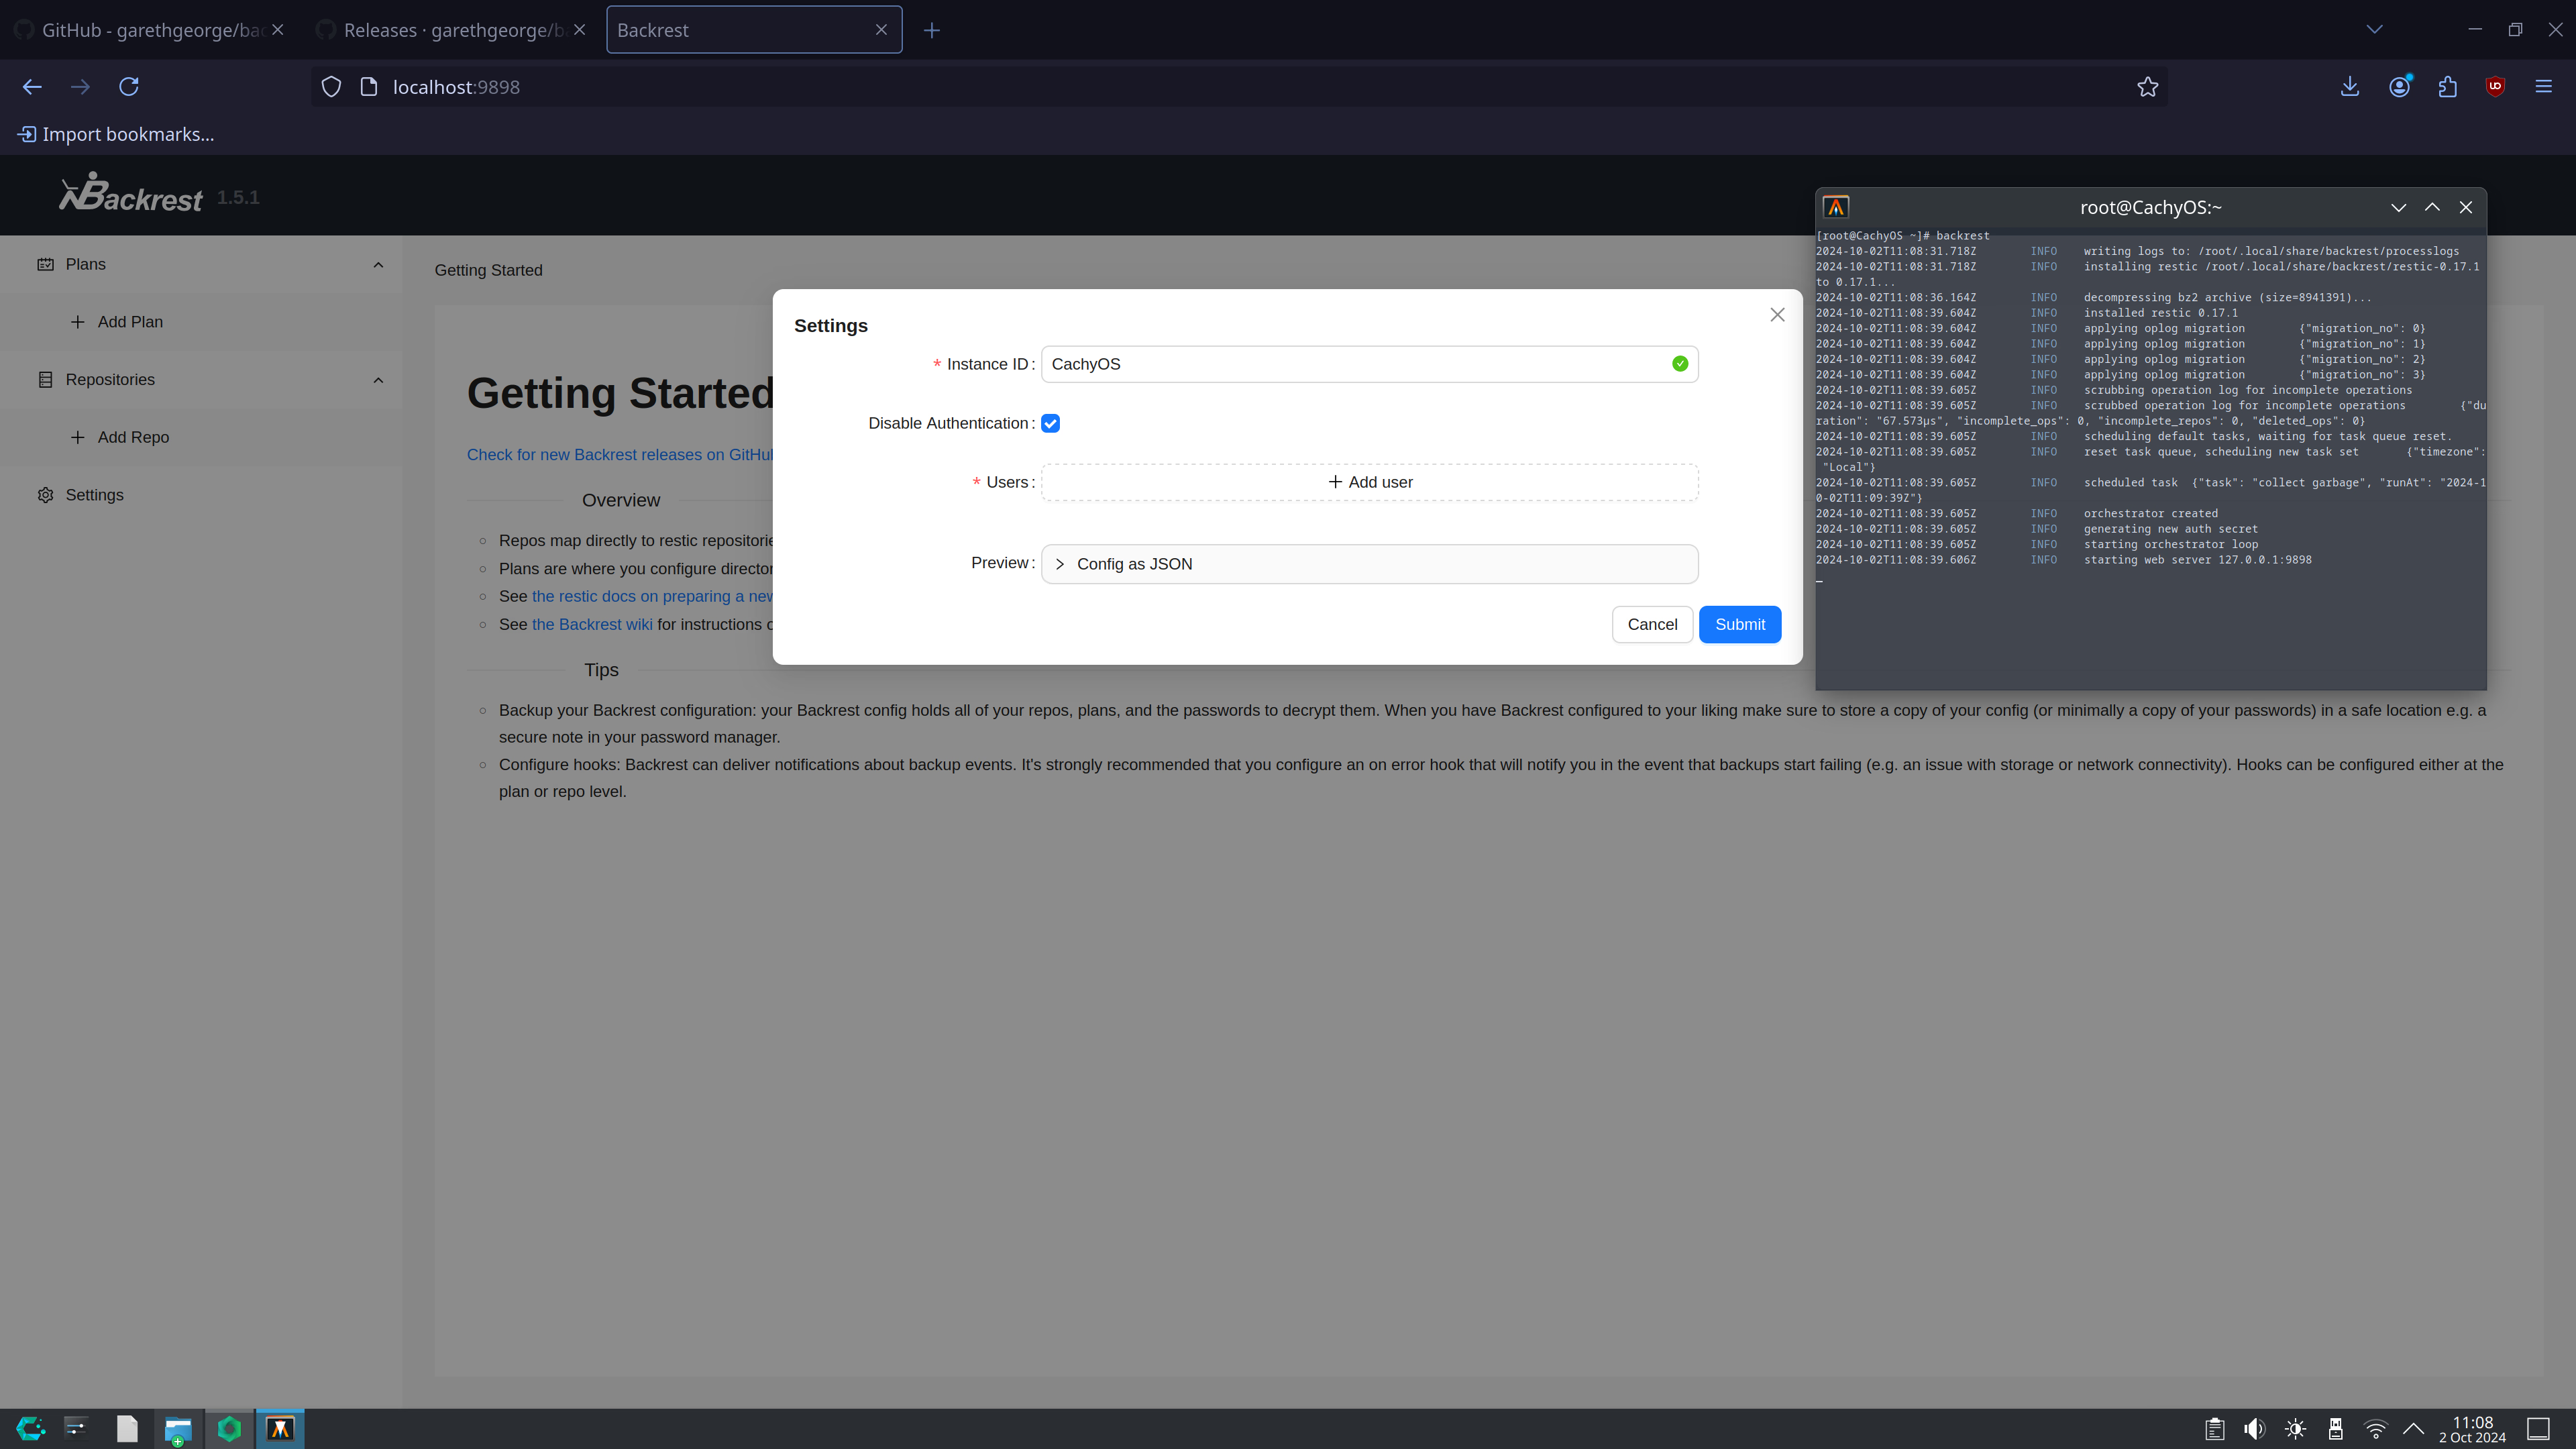
Browse to your backrest webui at localhost:9898
Then you'll see a interface to let you create the admin role of backrest.
I just let [Disable Authentication] ✔️, but if your system isn't under NAT, you ought to create username and input a strong password.
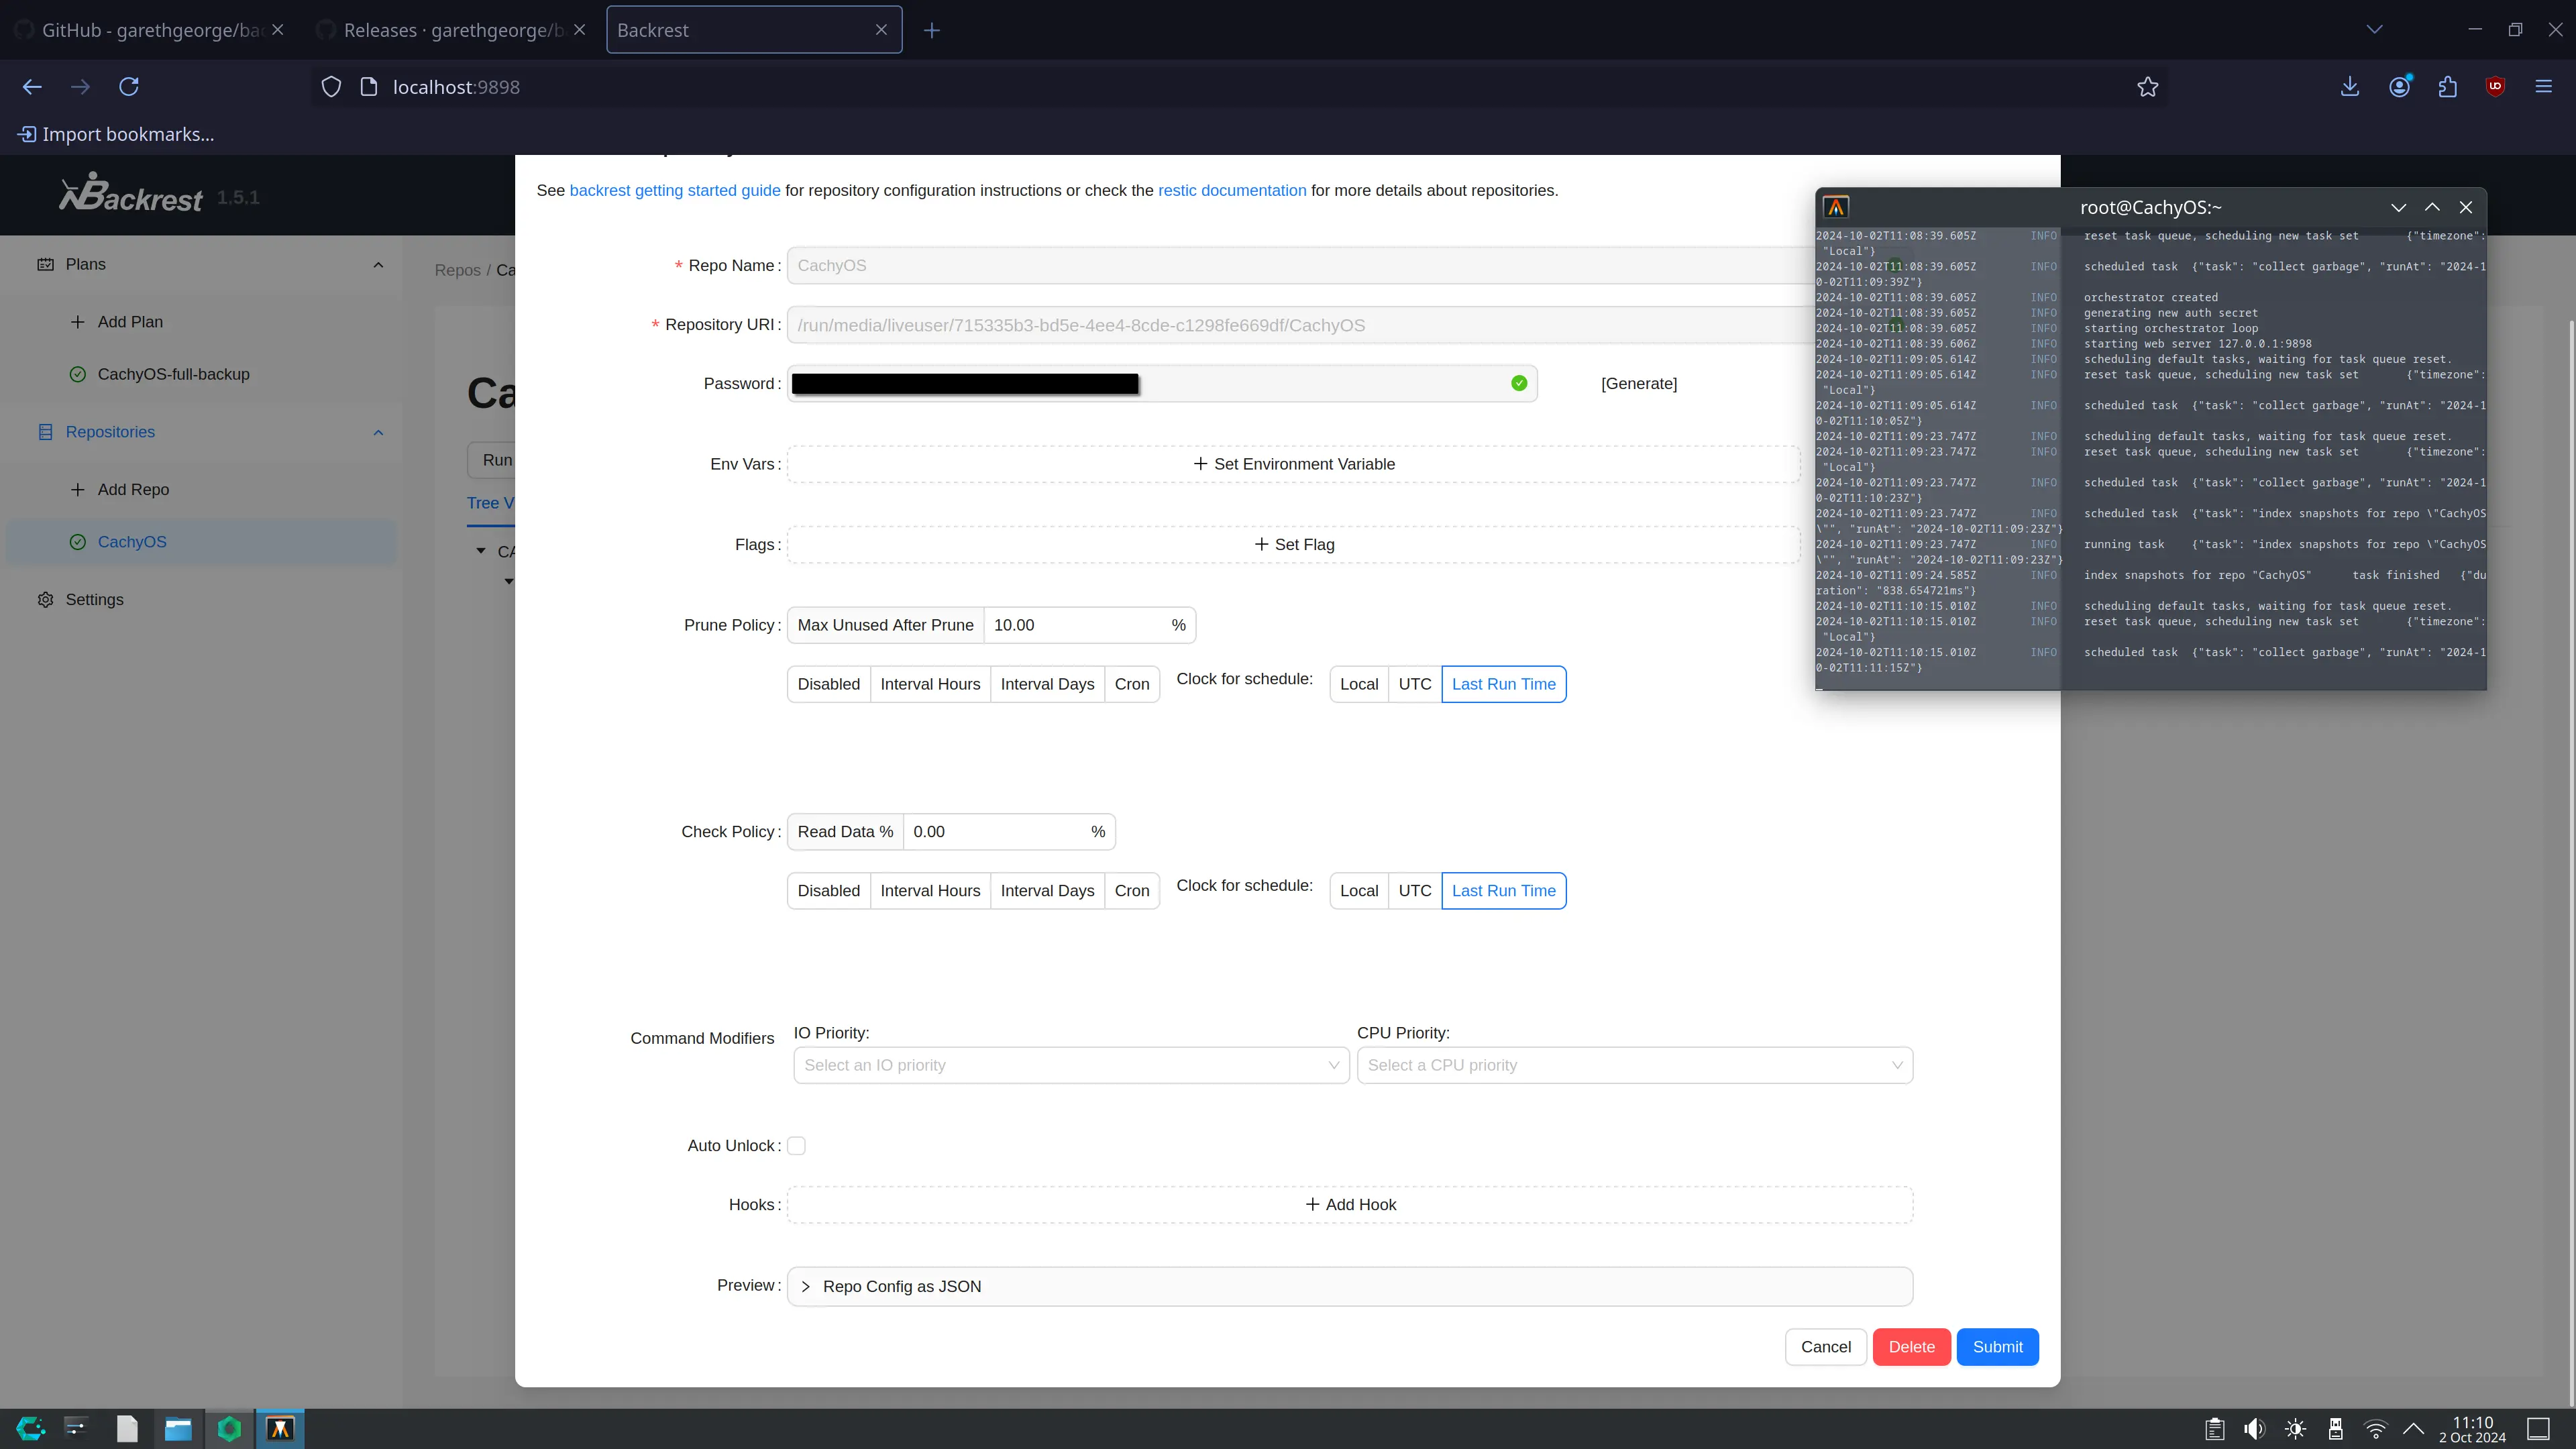
Add Repo:
Click [+ Add Repo], here is my configuration:
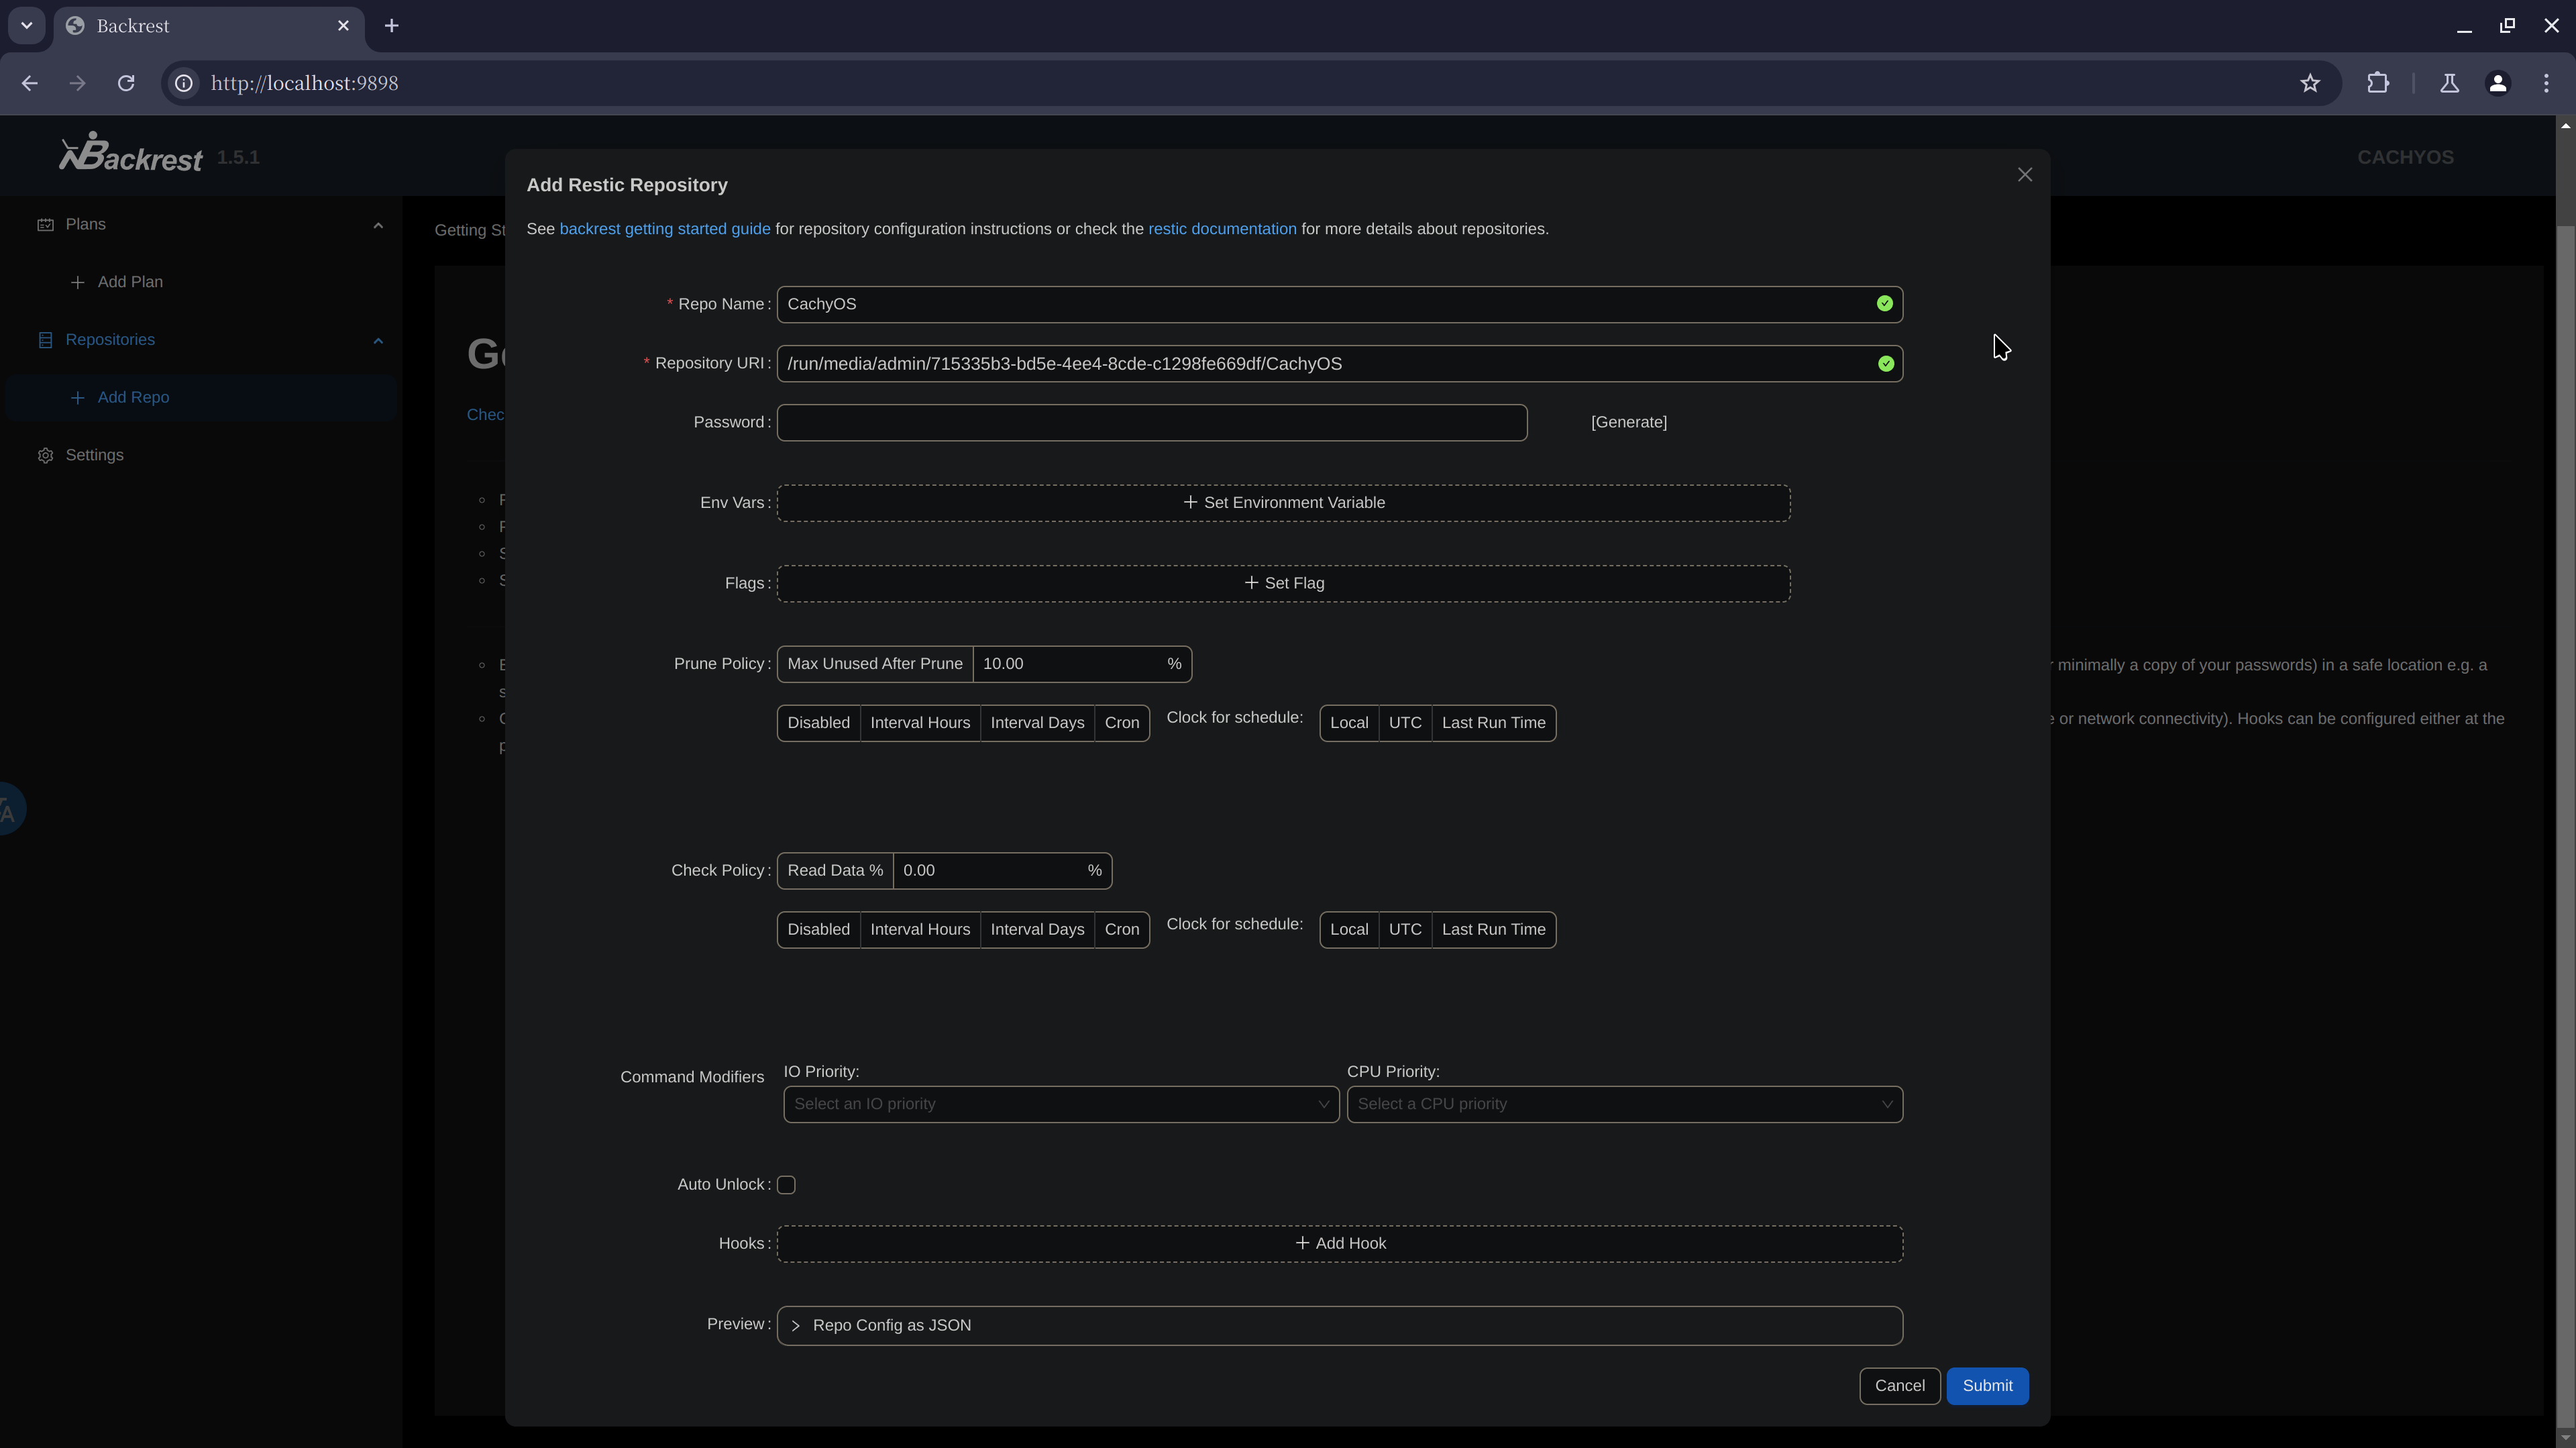
Explanation:
- [Repo Name] is doesn't matter what you set.
- [Repository URI] is the directory of the backup disk where you mount.(I set under /CachyOS to make the location of backup folder not at the root directory of this disk volume.)
- [Password] should be set by yourself,it is like the passphrase for encryption.
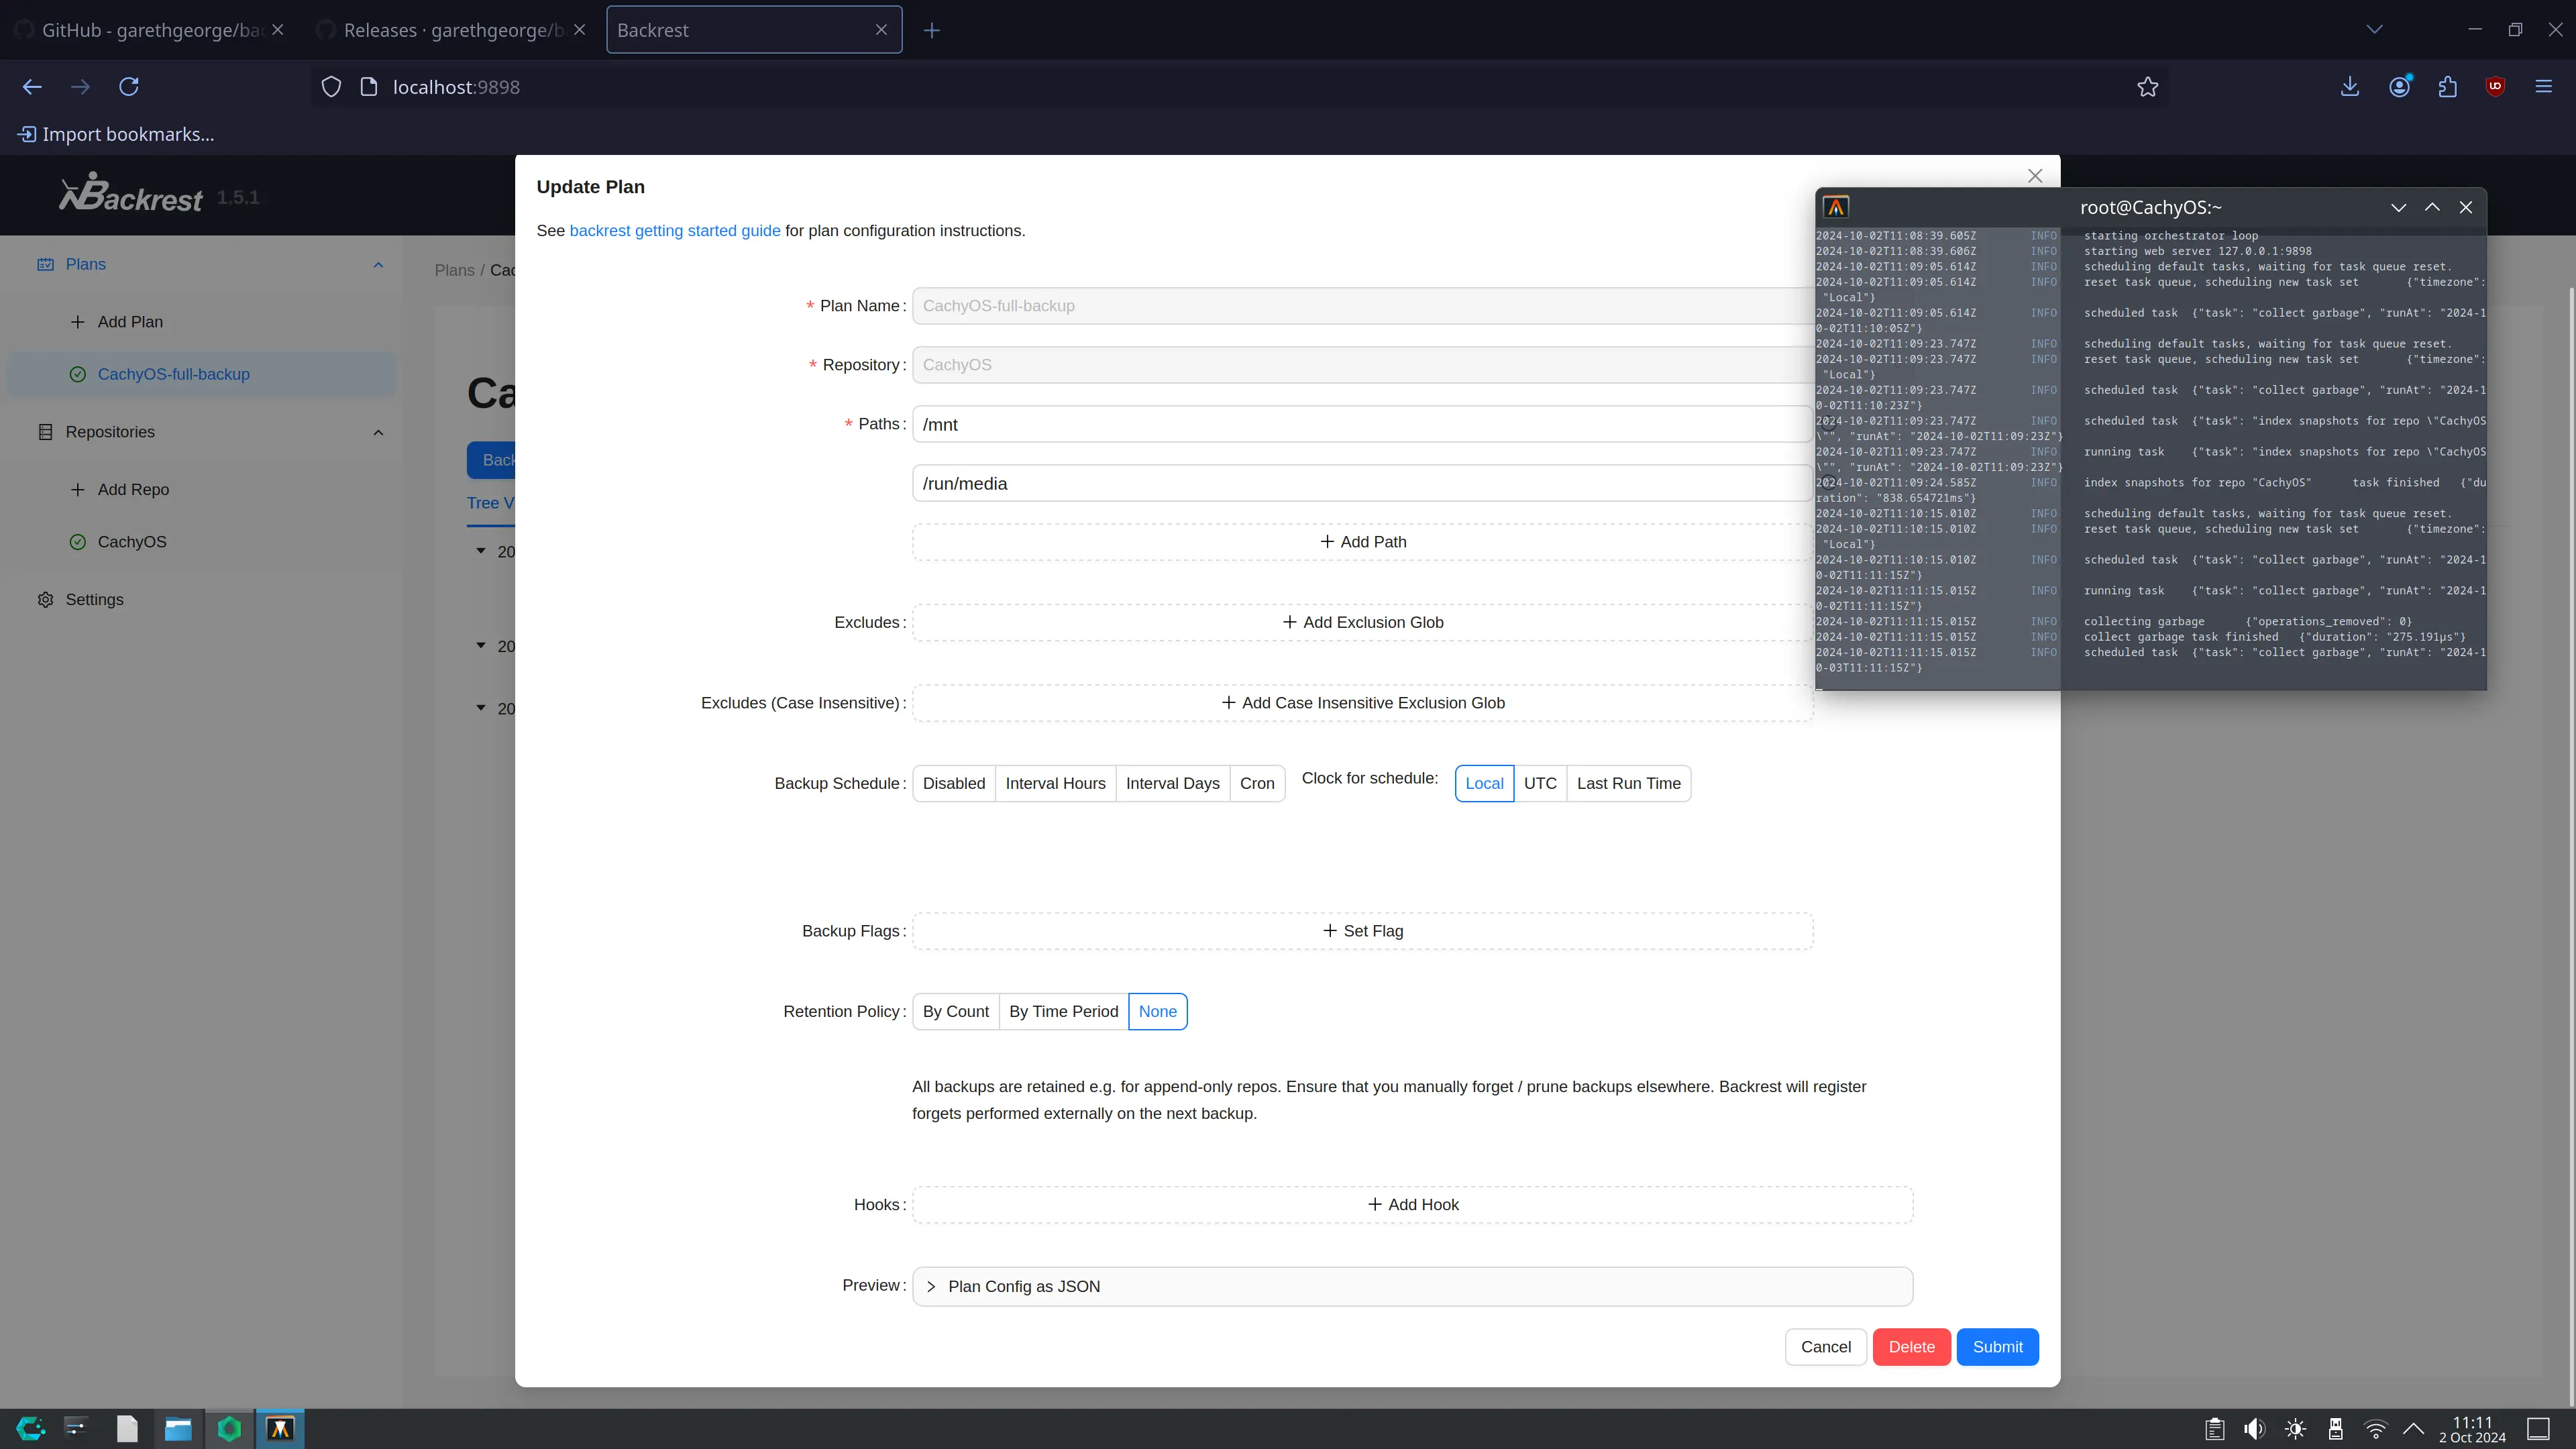
Add Plan:
After [Submit] the configuration of Restic Repository, you need to click [+ Add Plan]
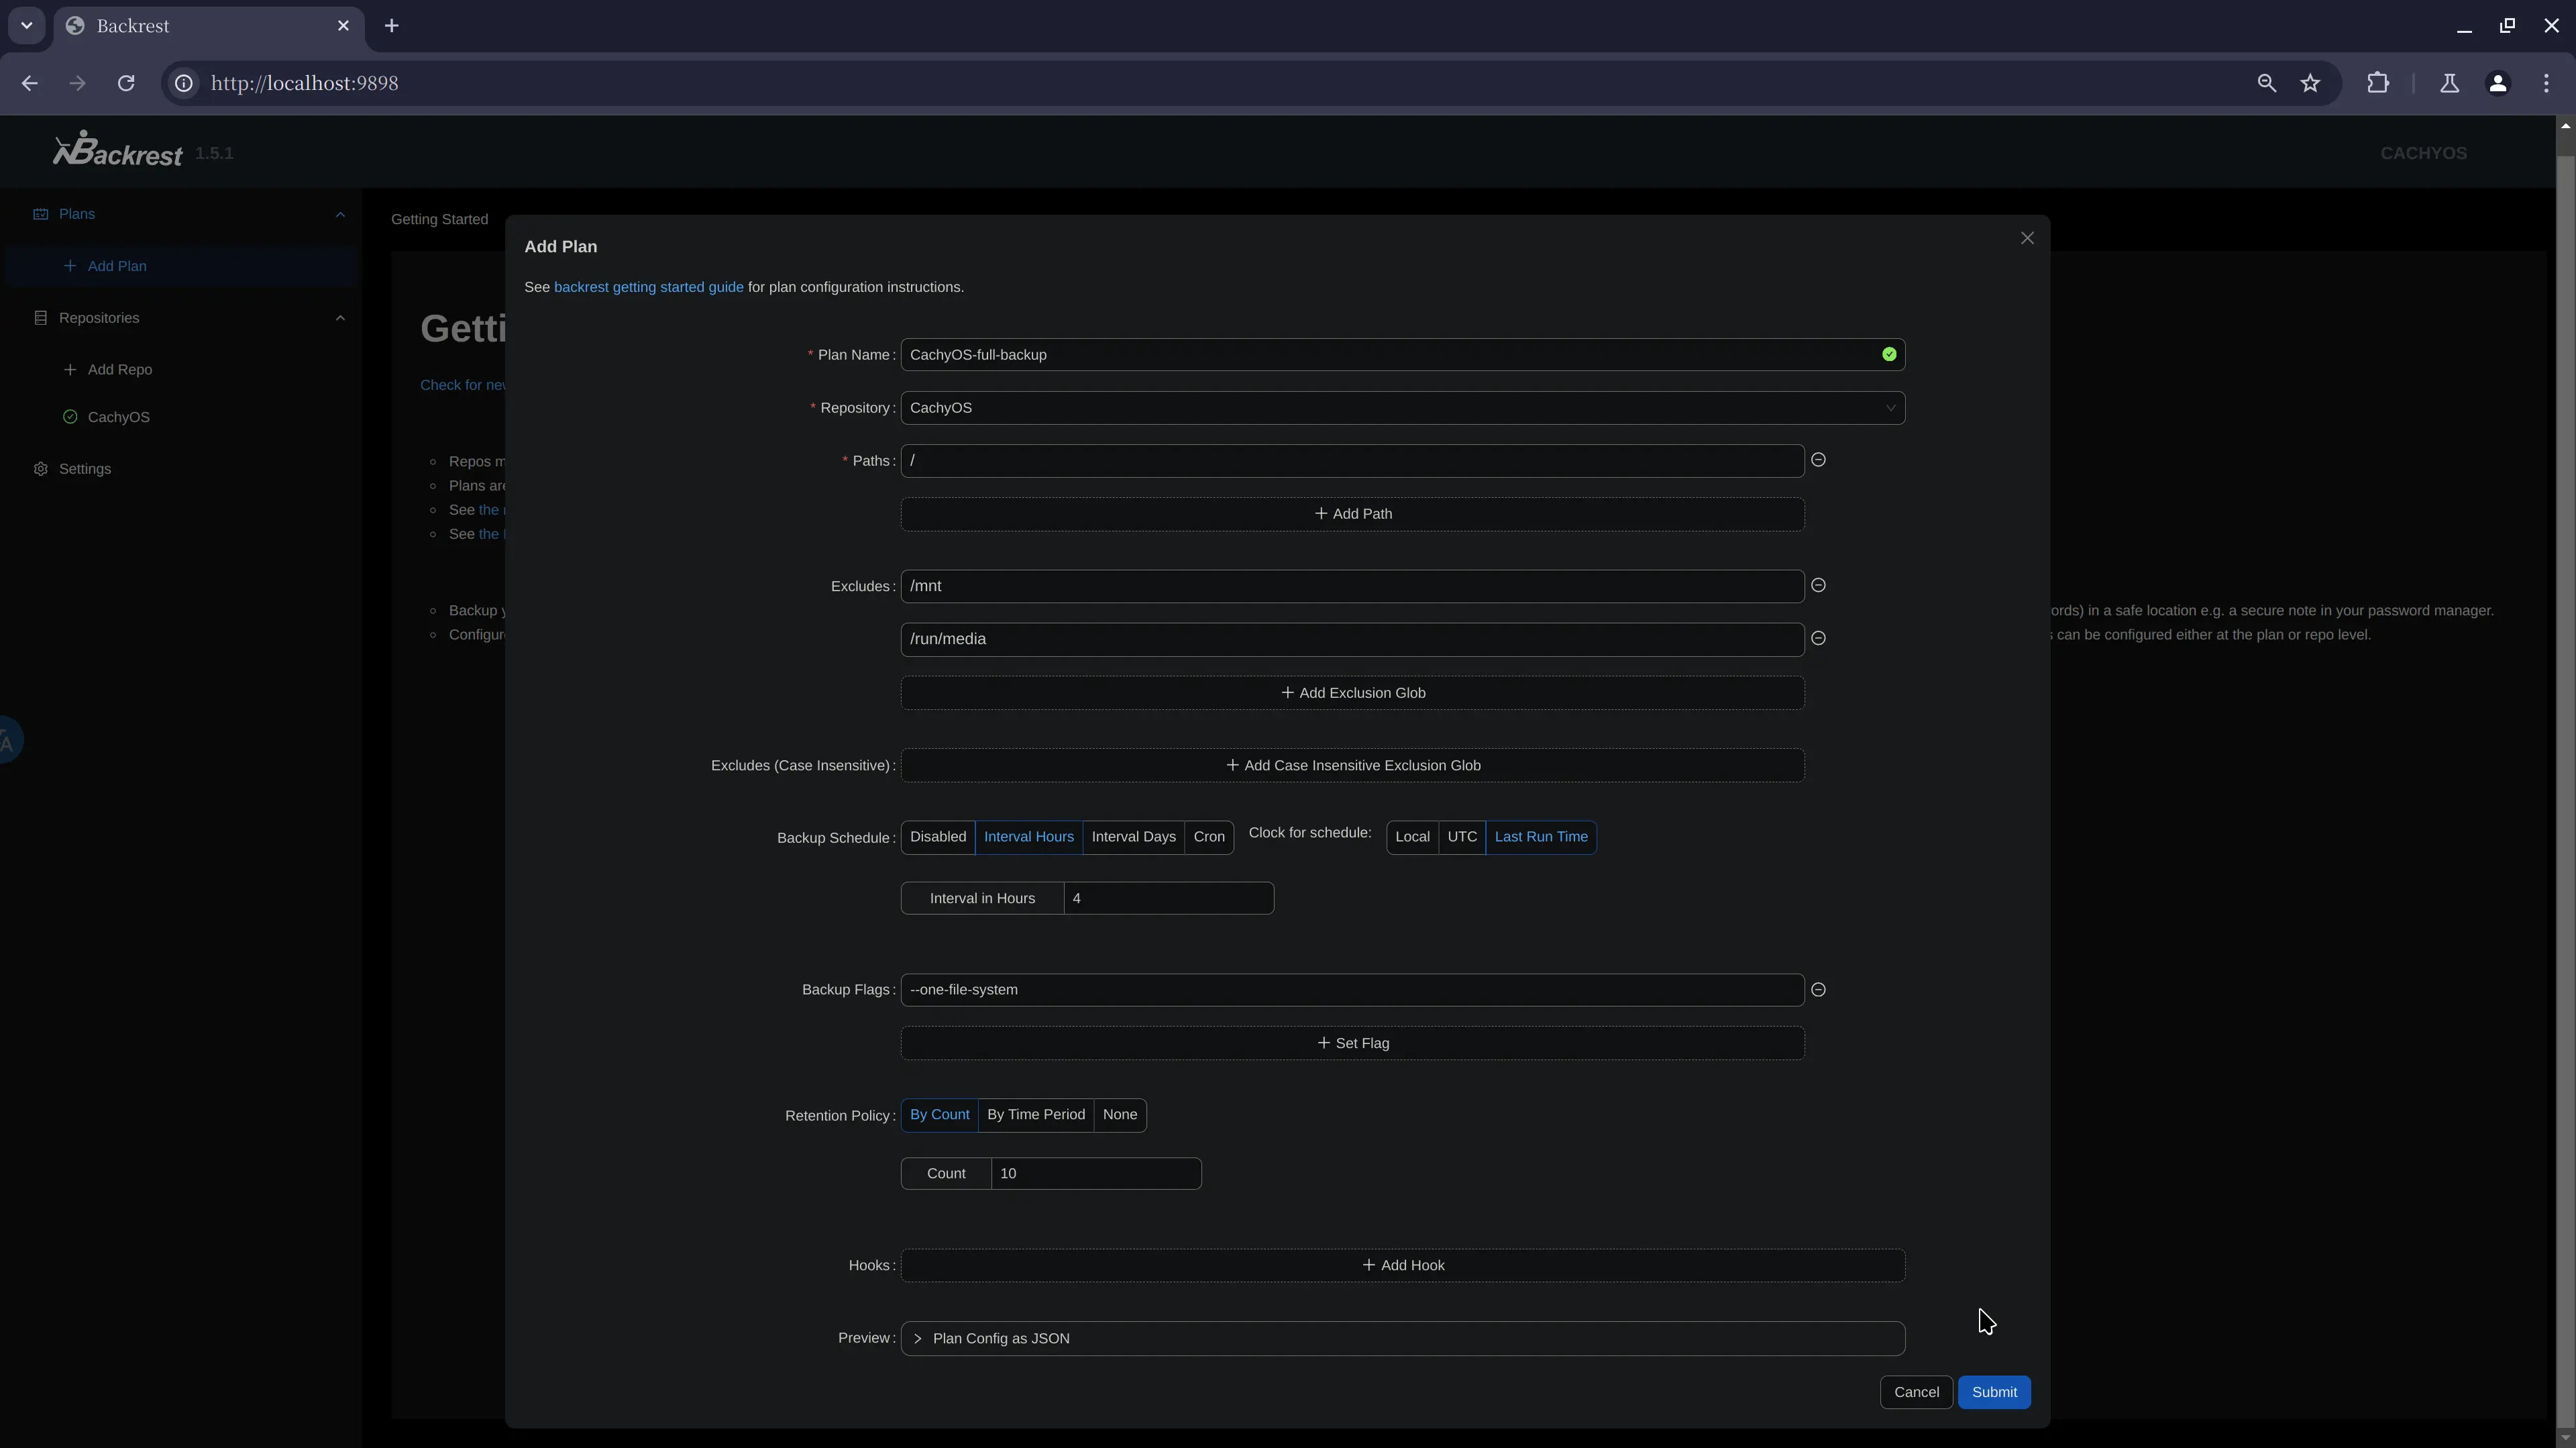
Explanation:
- [Plan Name] is doesn't matter what you set.
- [Repository] is just as [Repo Name]
- [Paths] should be set as root directory i.e. / (So it could do a full backup)
- [Excludes] are the directories should not be backed up.(At least set as the example)
- [Backup Schedule] as the example it will automatically do a backup every 4 hours.(You can change it by yourself.)
- [Clock for schedule] just recommand to set as [Last Run Time]
- [Backup Flags] add
--one-file-systemso /proc /tmp and so on won't be backuped.(More explanations here: https://restic.readthedocs.io/en/latest/040_backup.html#excluding-files
Test:
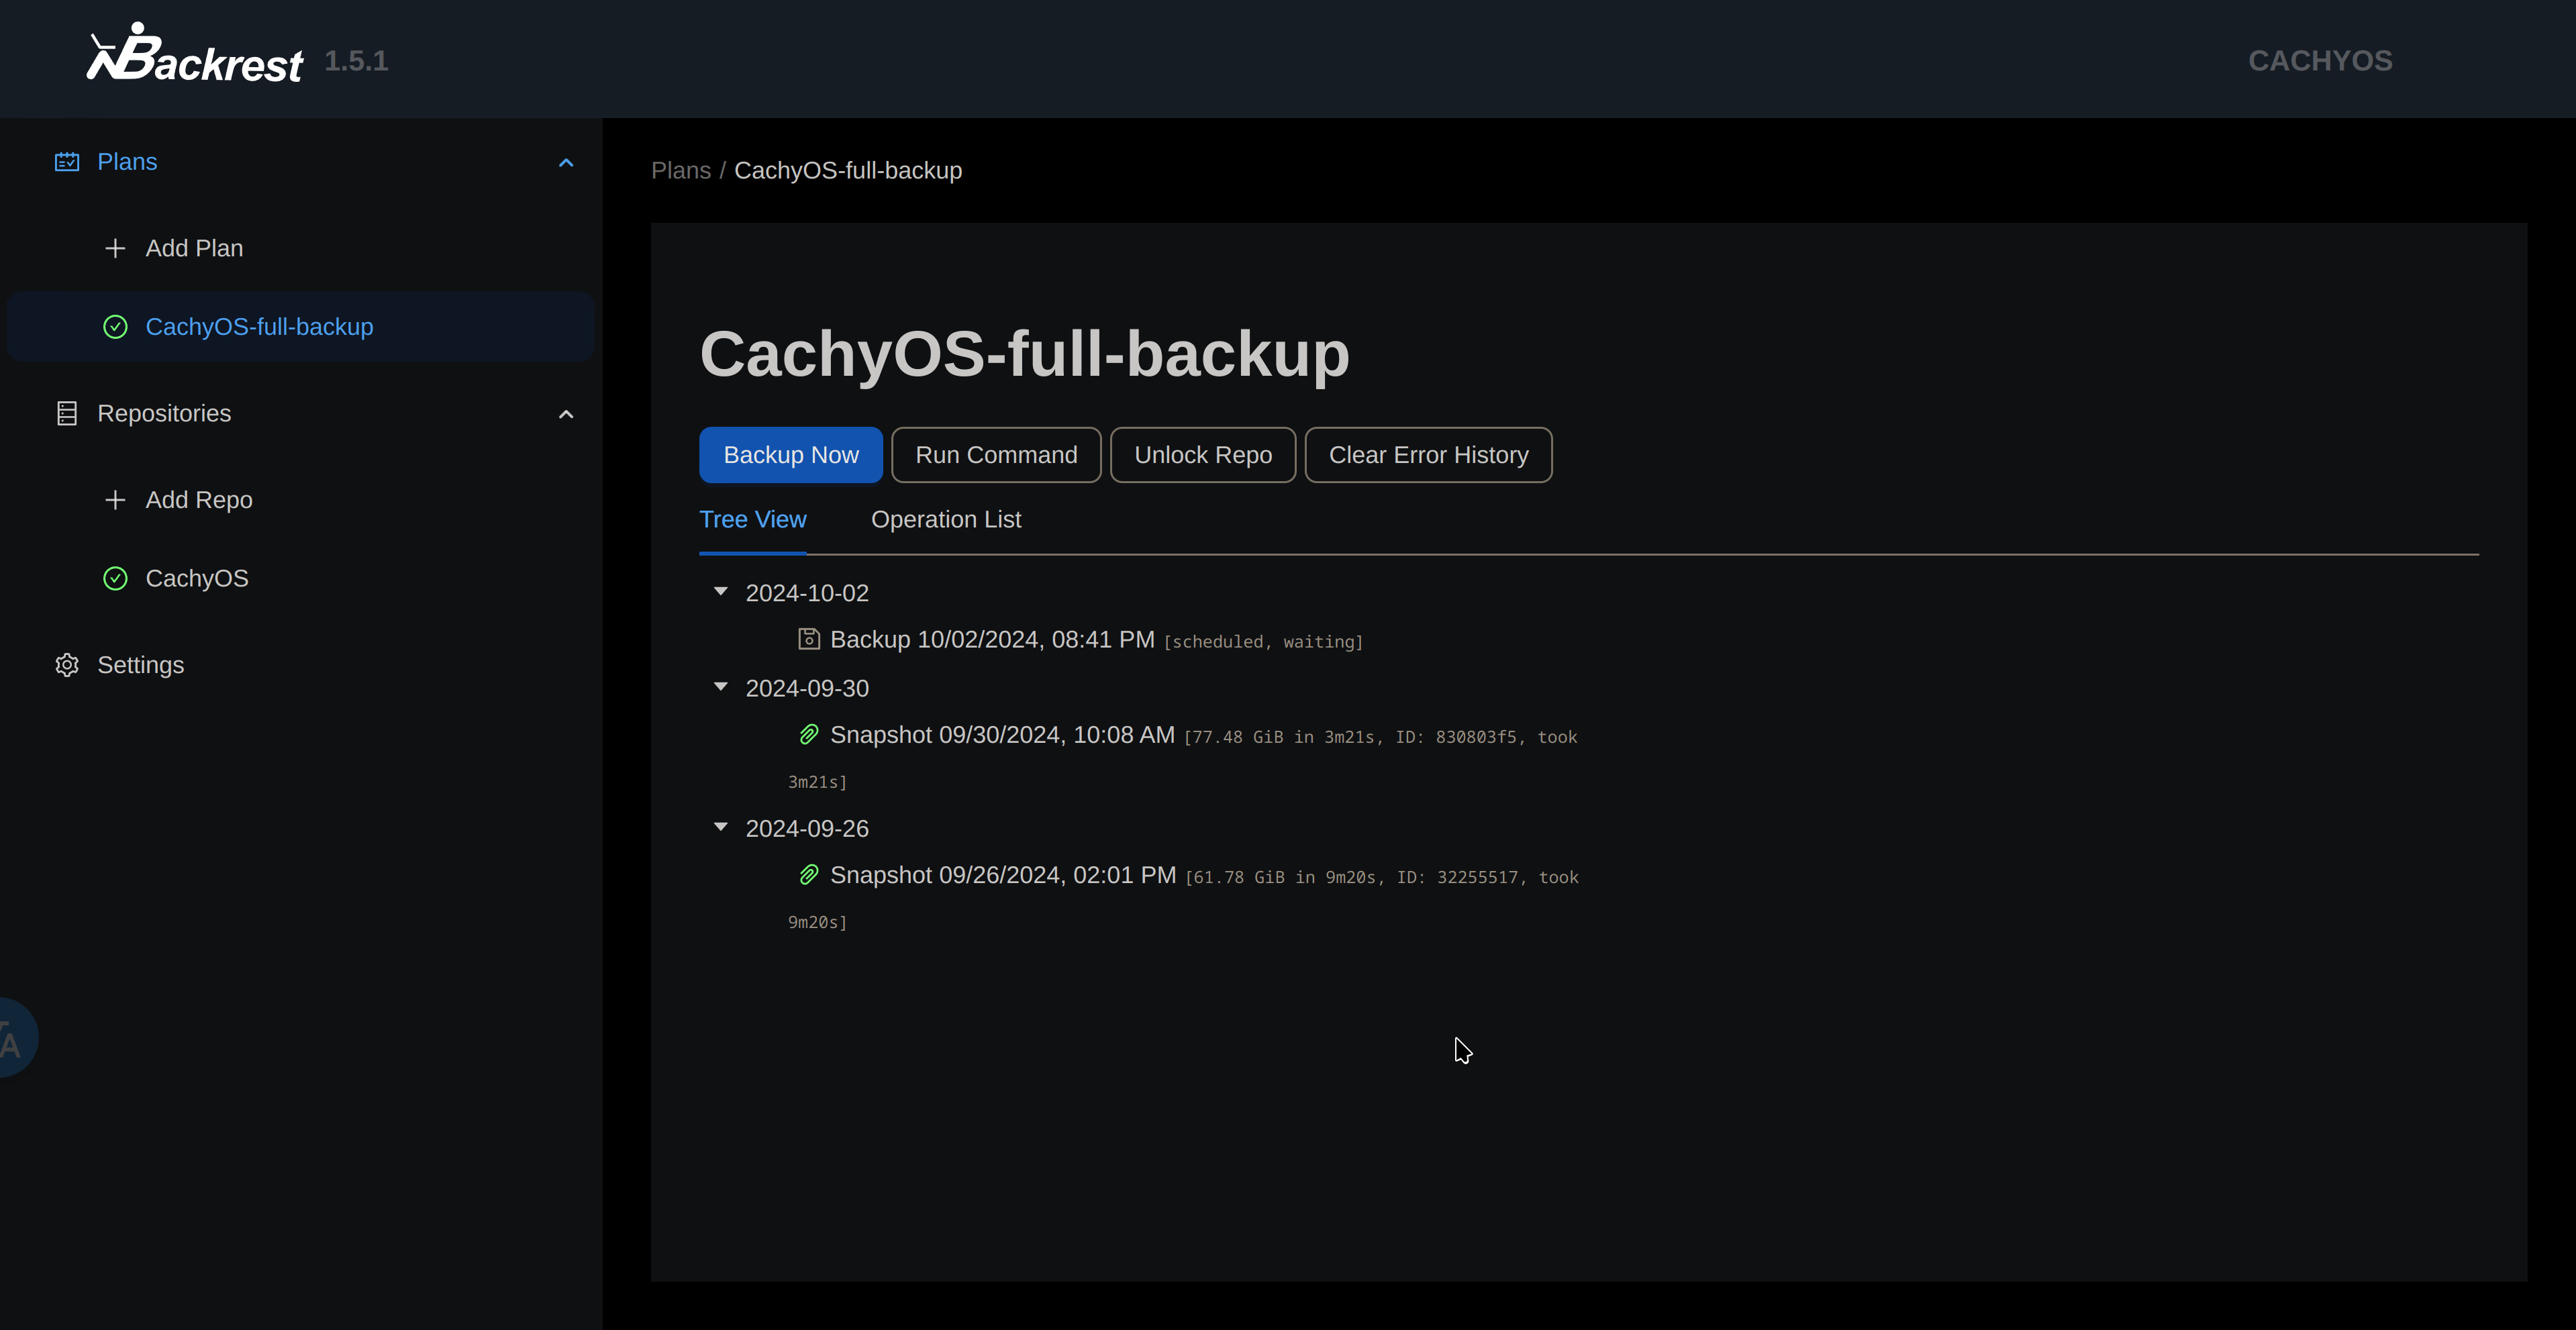
Click [Backup Now], wait the first long full backup process done.(Here I have backuped before, so just take a look the success result.)

At this point, the configuration of backrest is complete. It will automatically backup the whole system seamlessly in the background.
Restore
Now, suppose your Linux system disk just explodes, only left your backup volume.
Luckily, you have a disaster recovery because of the automatically backup by backrest.
So let's go to the LiveCD of your Linux Distro(as for me it is CachyOS LiveCD) , and make your system restore like before.
First:
Install backrest in LiveCD
mkdir ~/Downloads

cd ~/Downloads

curl -L https://github.com/garethgeorge/backrest/releases/latest/download/backrest_Linux_x86_64.tar.gz -o ~/Downloads/backrest_Linux_x86_64.tar.gz

mkdir ~/Downloads/backrest_Linux_x86_64

tar -zxvf ~/Downloads/backrest_Linux_x86_64.tar.gz -C ~/Downloads/backrest_Linux_x86_64

sudo cp ~/Downloads/backrest_Linux_x86_64/backrest /usr/bin/backrest

rm -rf ~/Downloads/backrest_Linux_x86_64 ~/Downloads/backrest_Linux_x86_64.tar.gz
Switch to the root user to get full file access.
sudo -i
or
su root
Then input backrest in terminal, but this time, do not close backrest in terminal, and also no need of systemd-service.
Just browse to your backrest webui localhost:9898
Then you need to restore your configuration like before manually.
Second:
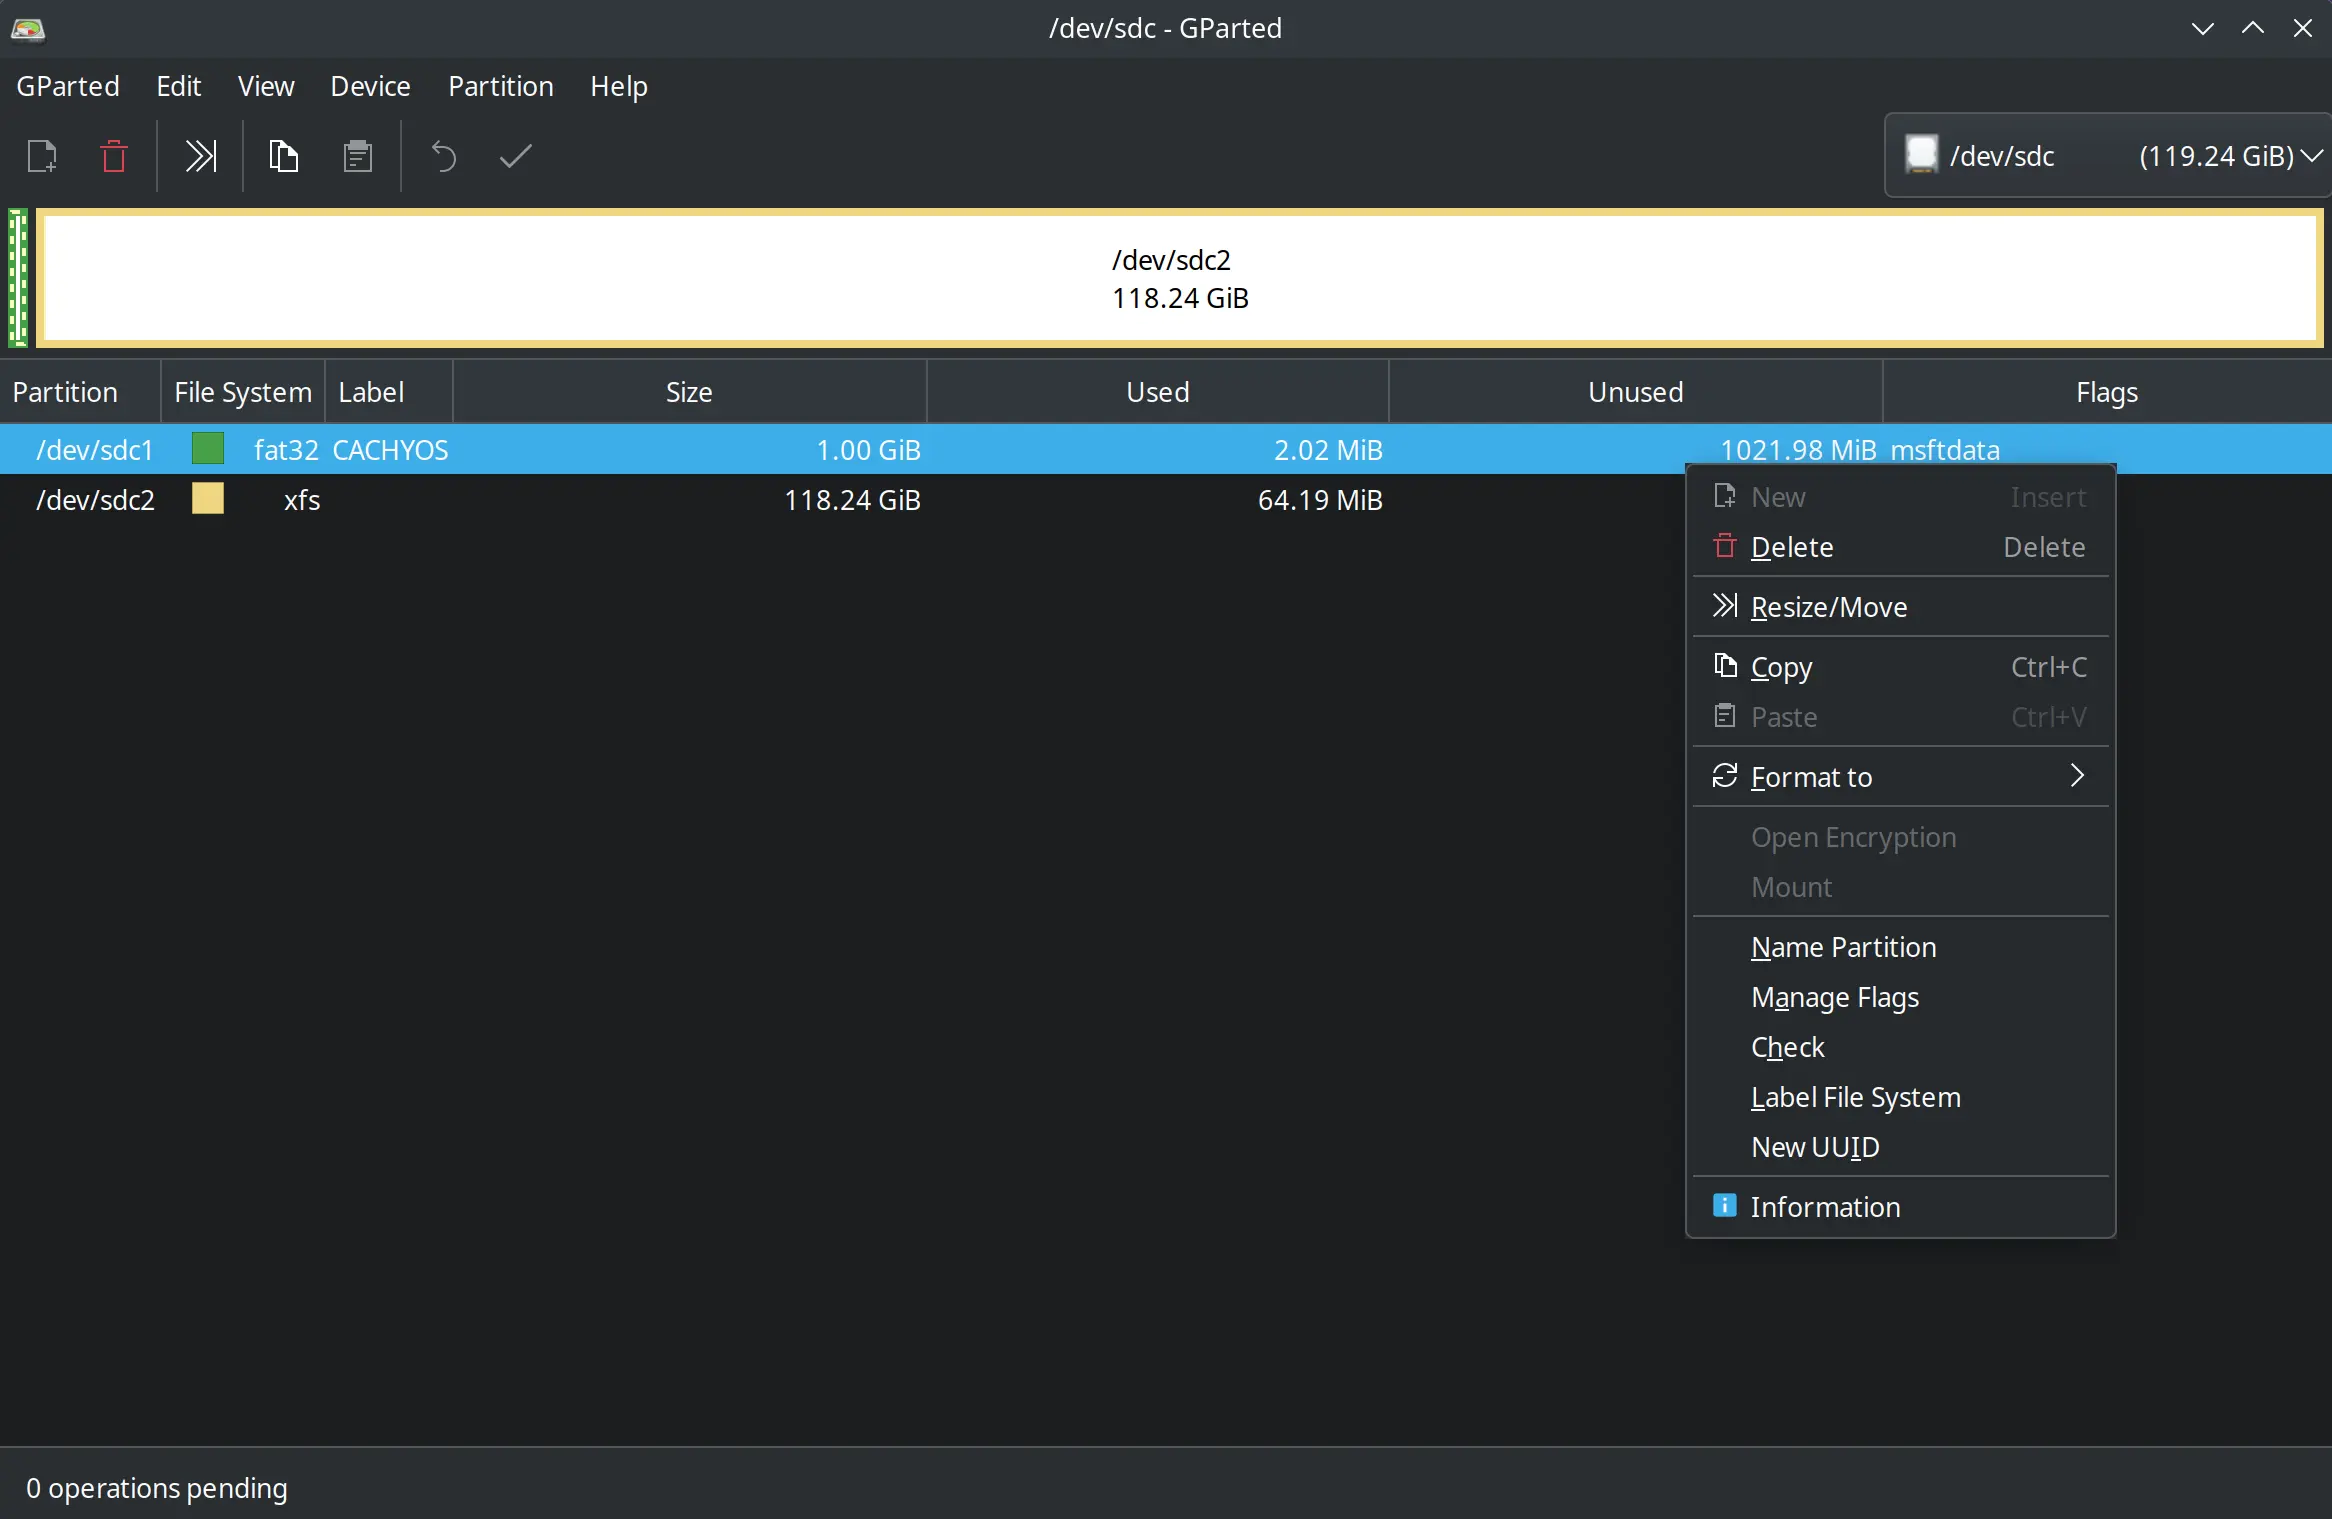
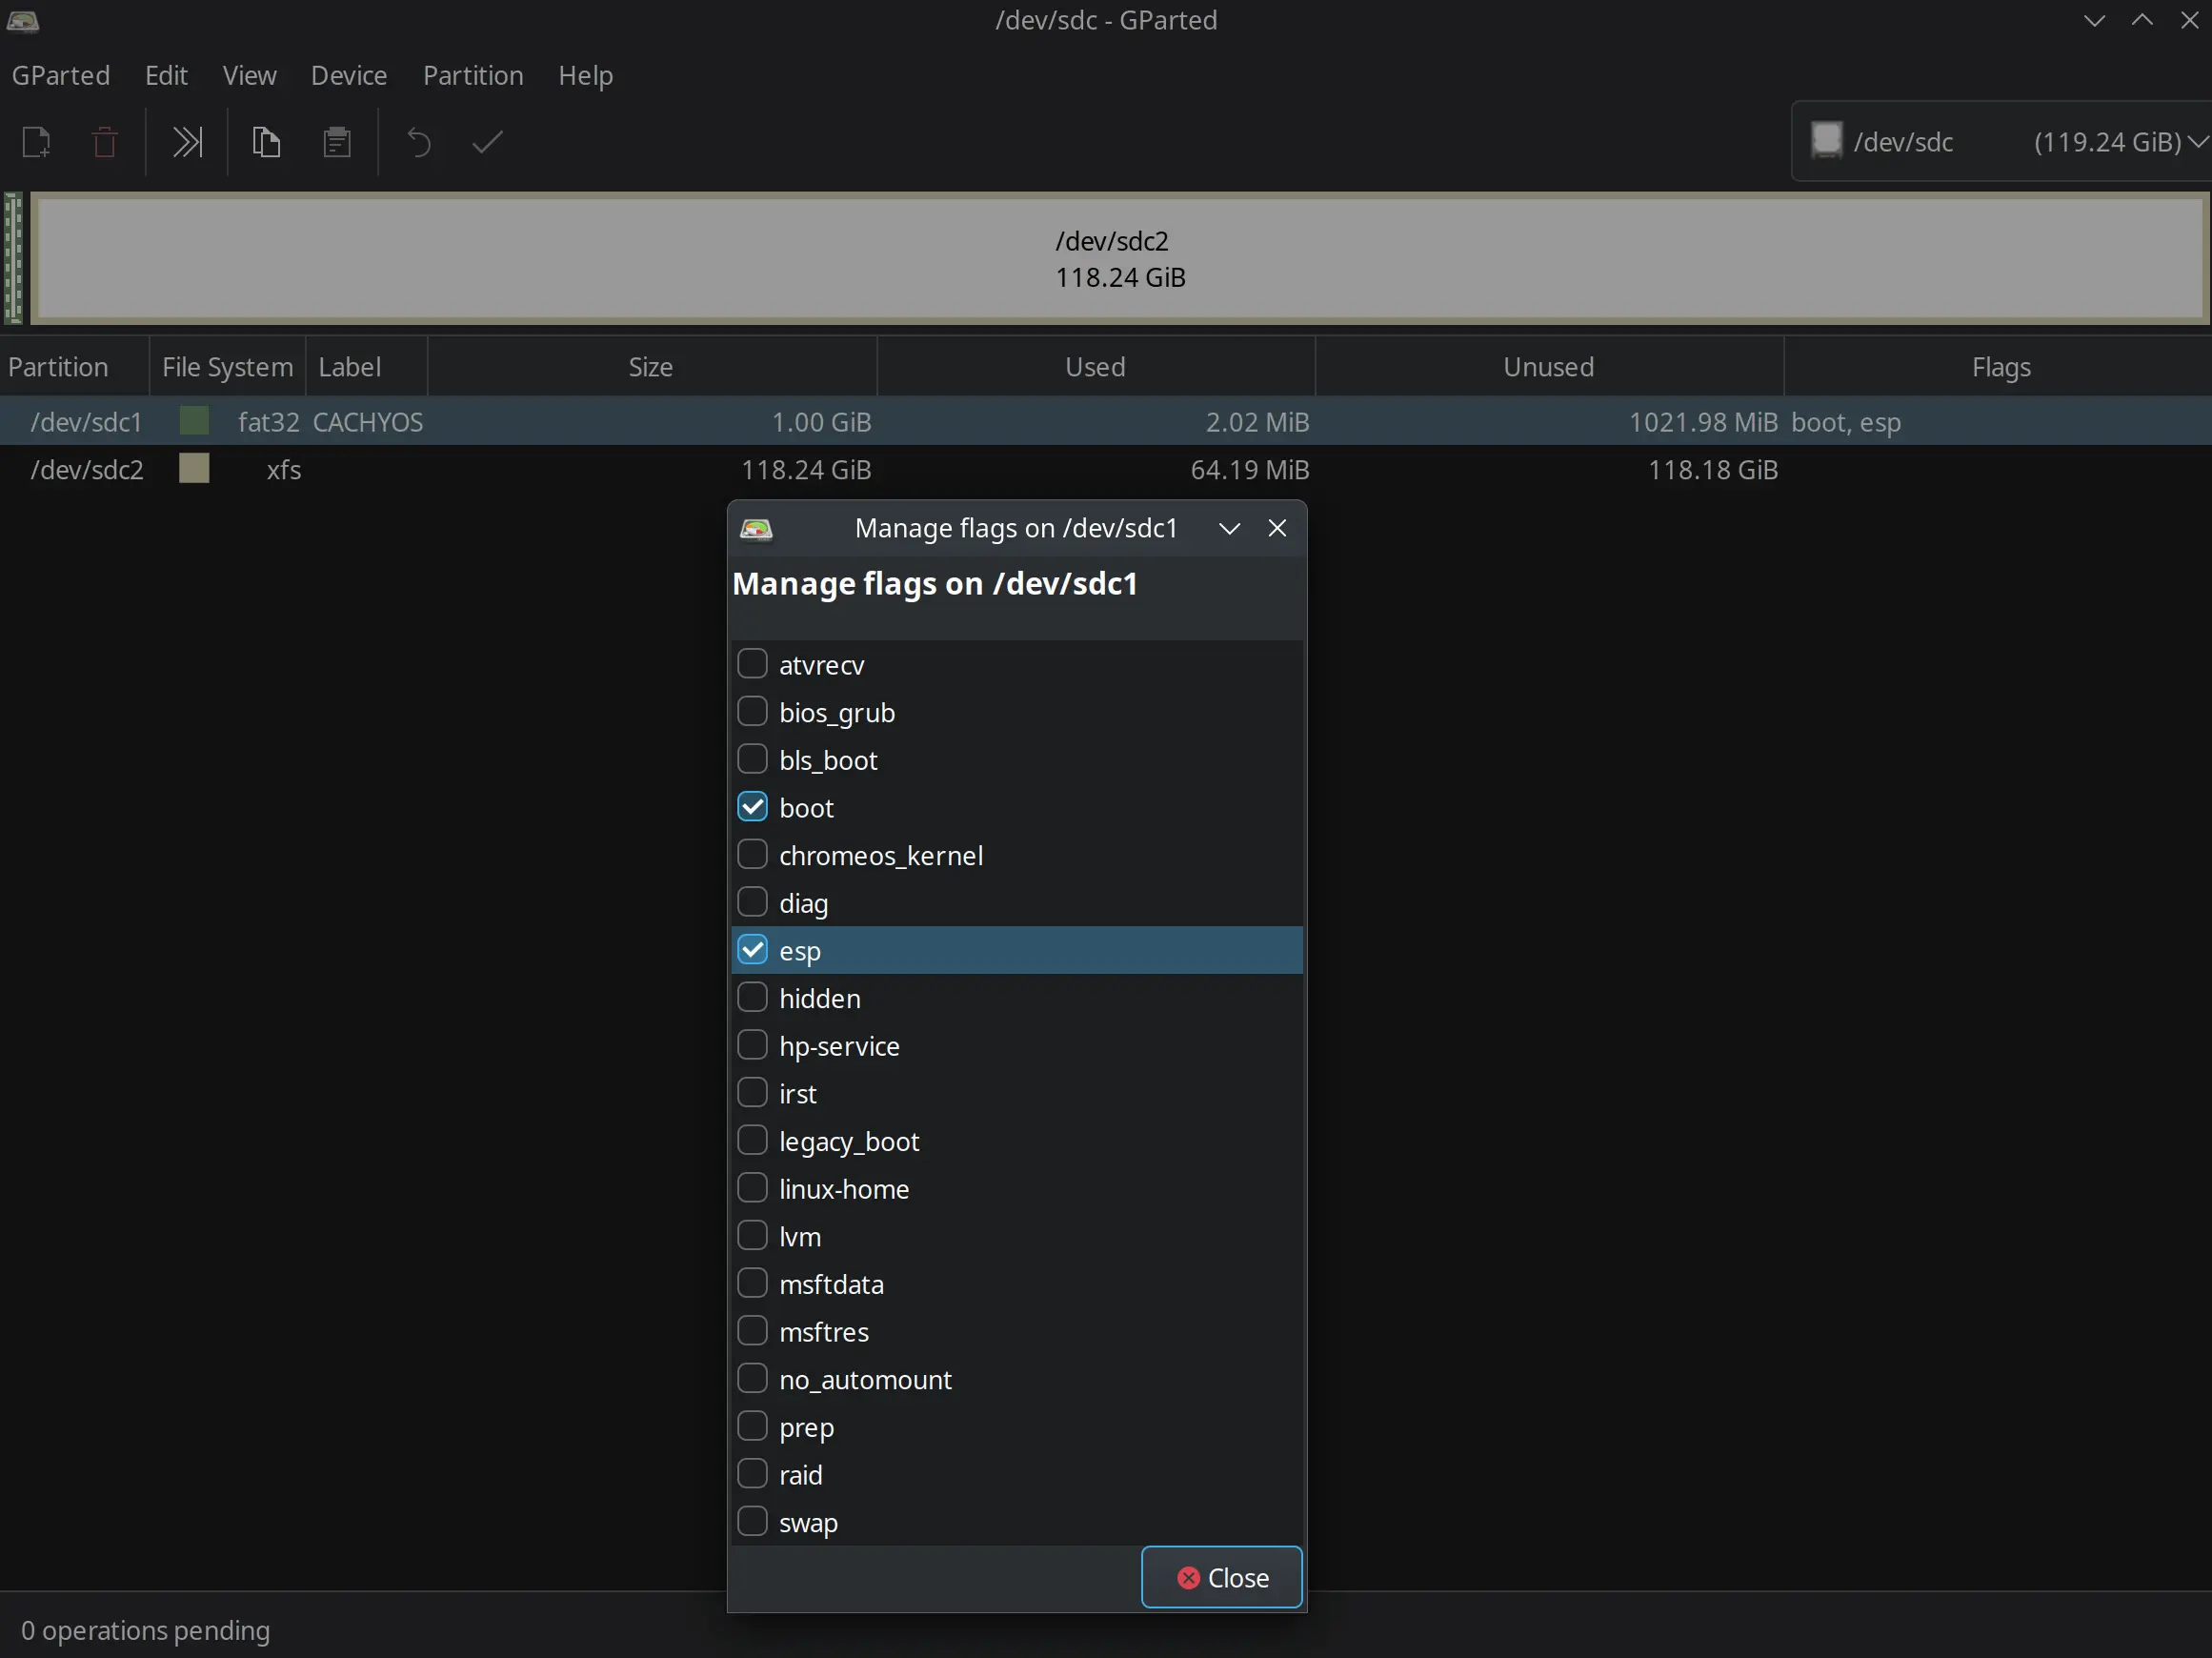
Erase a new disk for your new Linux system disk, here use Gparted for a quick work.

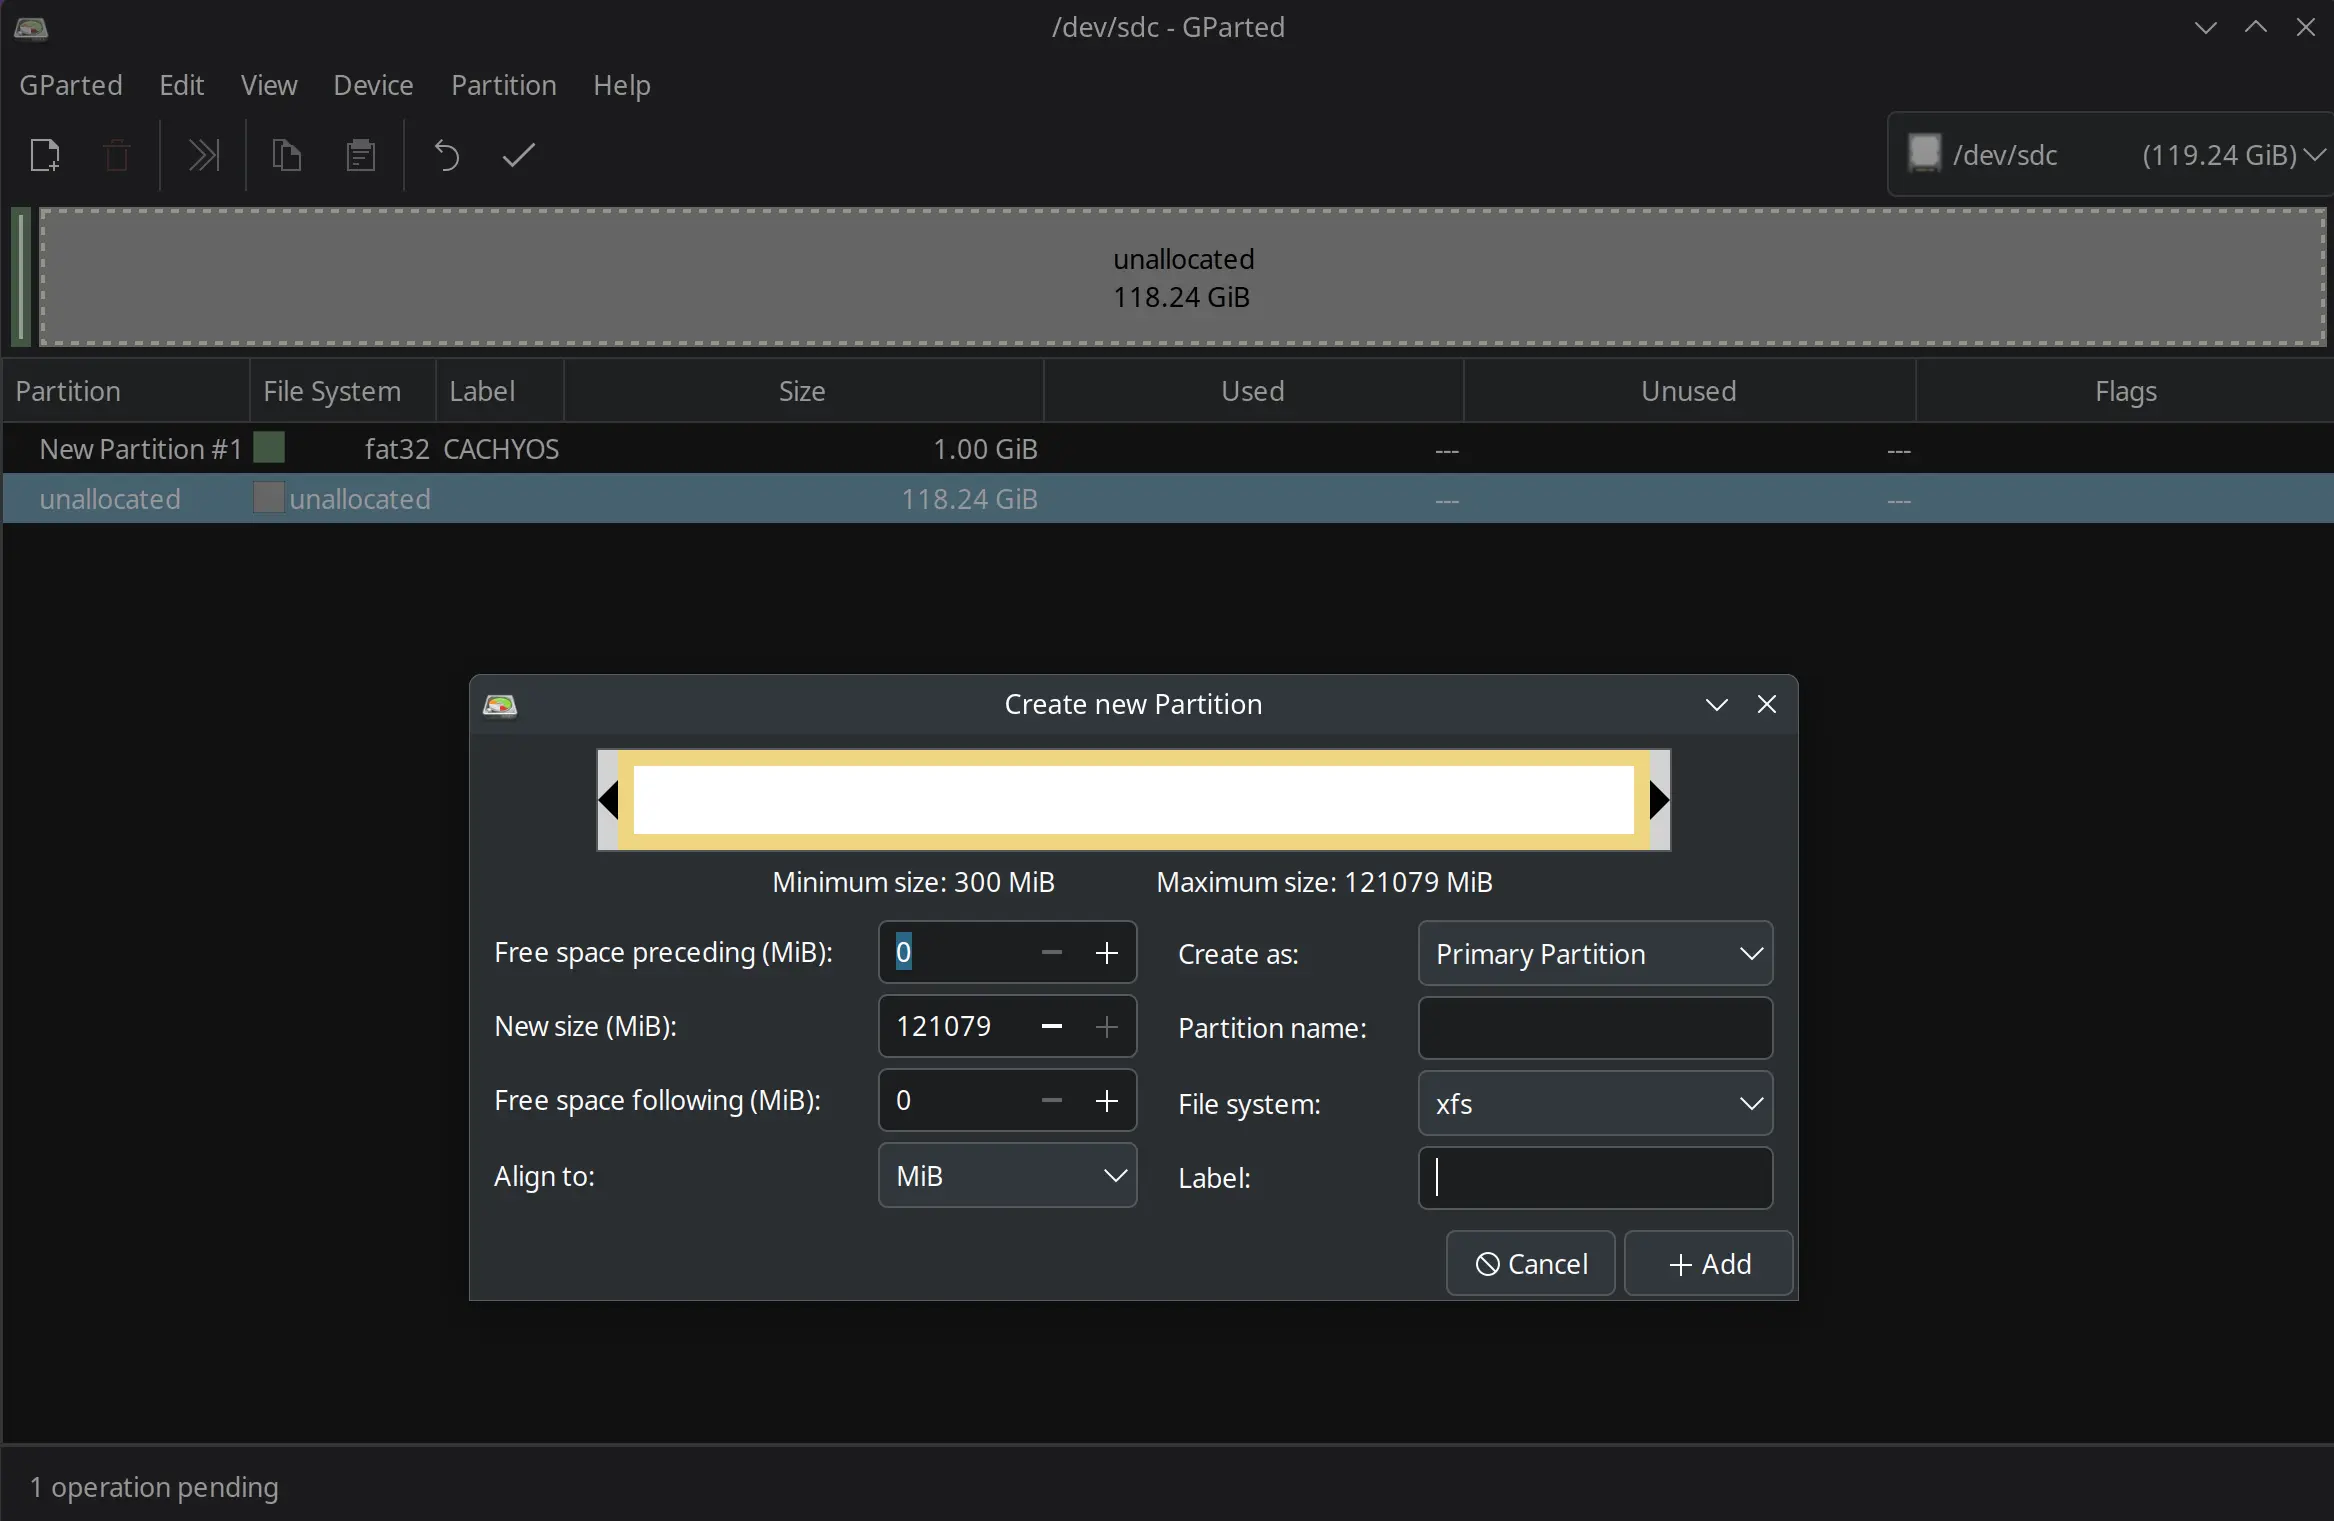
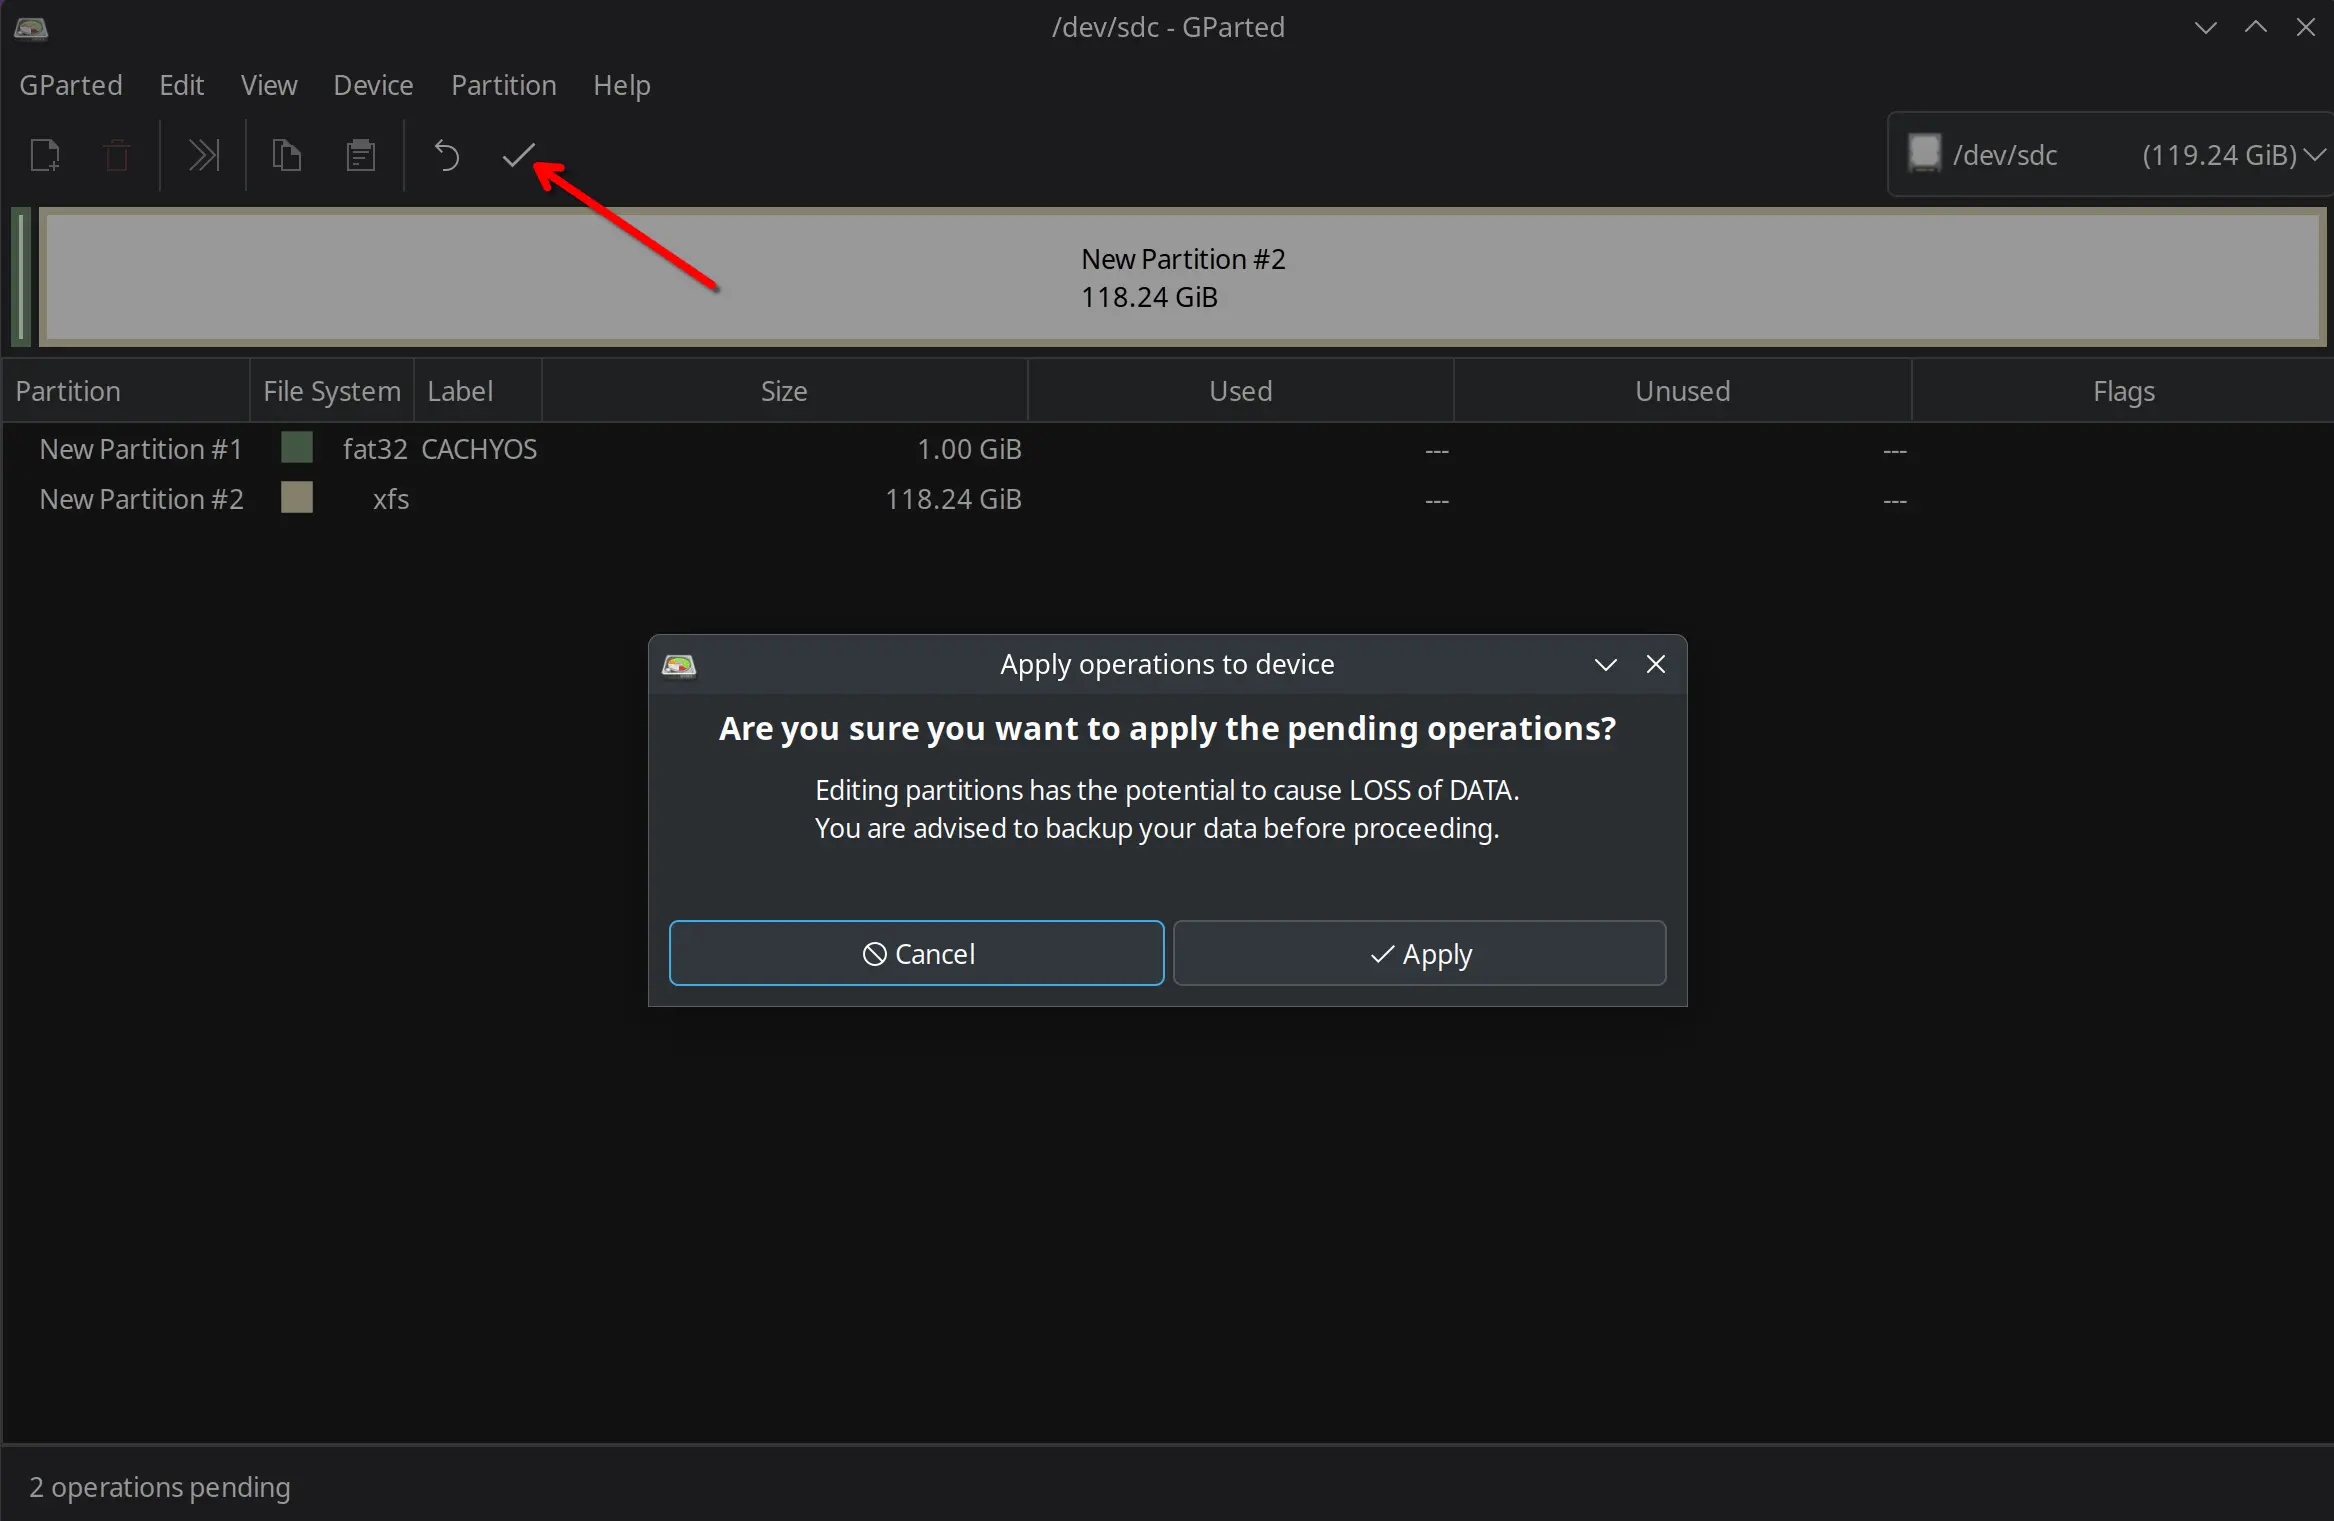
Notice: You should add [boot] & [esp] flags to the Fat32 EFI volume.Click [Manage Flags] to do this.
Third:
Mount the new Linux system disk partition and EFI partition.
sudo -i
mkdir /mnt/boot
mount /dev/sdc2 /mnt
mount /dev/sdc1 /mnt/boot

Notice: /dev/sdcX is define by your system environment, you can use command `lsblk` and `blkid` to see this.
Now you can execute restore command in backrest.
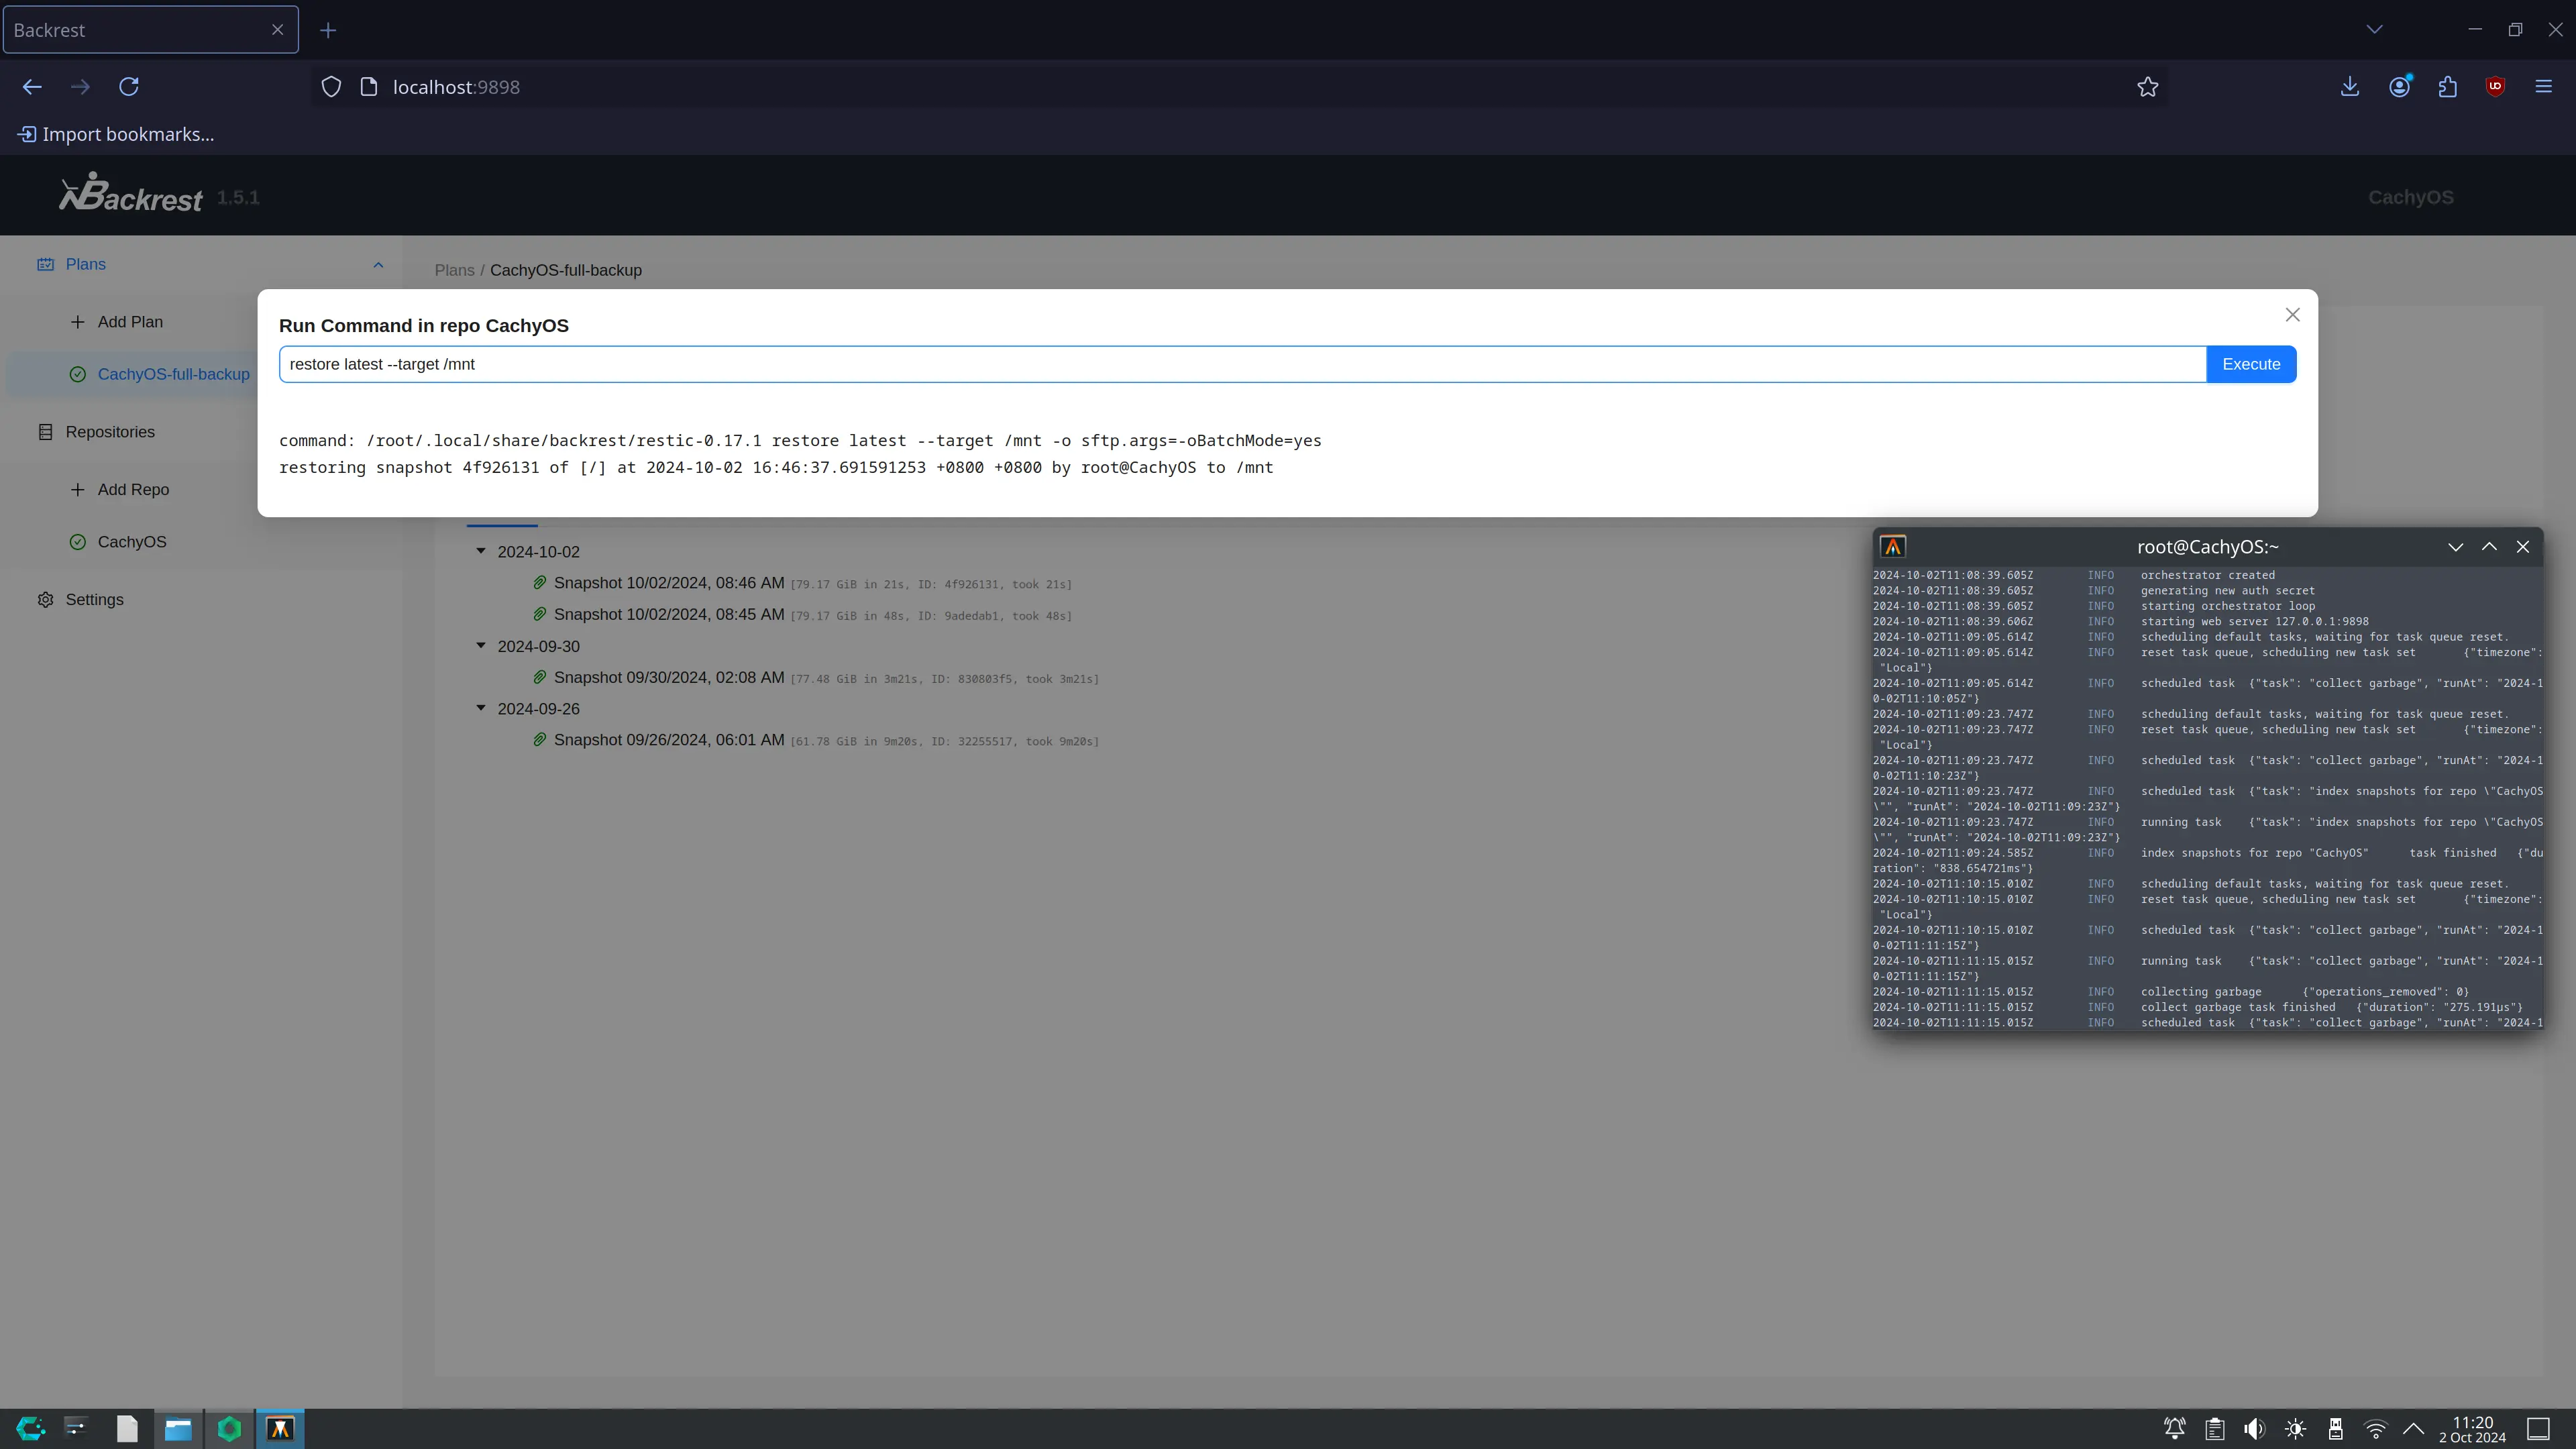
Notice: This process may take a lot of time, but you need to be patient.
Finally:
It's almost done, just need to fix bootloader.
genfstab -U /mnt > /mnt/etc/fstab

arch-chroot /mnt

bootctl install

paru -S linux-cachyos

Notice: `paru -S linux-cachyos` is works only in CachyOS(or other Arch Linux), if you're using other Linux Distro, you may needn't run this command.

mkinitcpio -P
Notice: /etc/crypttab should be reconfigured if your system once have LUKS crypt.
Now, you could reboot, and boot into the formal system before the accident happened.
More About LUKS encryption
If you need LUKS encryption for the root partition, you need to create an encrypted root volume before restoring.However, due to space limitations, I won't go into more detail.